Showing posts with label javascript. Show all posts

Add Numbered Page Navigation Widget In Blogger

Have you seen "Older Posts" and "Newer Posts" navigation links in your homepage and archive pages? You have this kind of links to access your pages since Blogger doesn't have any built-in function on page numbering.Here's an excercise on the best way to include numbered page route utilizing Javascript to a Blogger/ blogspot blog.

add  numbered page navigation in blogger


 You can choose any of the 7 separate styles that I have specified beneath. In this tweak, I will show you  the best way to include numbered page navigation using Javascript to a Blogger/ Blogspot blog. You can choose any of the 7 separate styles that I have specified beneath.


Advantage of Using Page Numbered Navigation:


Page numbered Navigation  could help our website guests to explore faster (bounce starting with one page then onto the next page or click on a particular page) and know the total number of posts distributed.


Adding Numbered Page Navigation to Blogger


We will divide this tutorial into two steps.
Adding The CSS.
Adding The Script.

Now let's see how to add the CSS style for  your page navigation.

1. Adding The CSS


Go to Blogger Dashboard > Template > click on the Edit HTML button
Click anywhere inside the code area and press the CTRL + F keys to open the Blogger search box.
Type or paste the following tag inside the search box and hit Enter to find it:
]]></b:skin>
Now choose one of the following numbered page navigation styles and copy the code just below it. Just above ]]></b:skin> paste the code of the style that you want to use:

Style 1


numbered page navigation style 1
 #blog-pager{clear:both;margin:30px auto;text-align:center; padding: 7px;}
.blog-pager {background: none;}
.displaypageNum a,.showpage a,.pagecurrent{padding: 3px 7px;margin-right:5px;background:#E9E9E9;color: #888;border:1px solid #E9E9E9;}
.displaypageNum a:hover,.showpage a:hover,.pagecurrent{background:#CECECE;text-decoration:none;color: #000;}
 .showpageOf{display:none!important}
#blog-pager .showpage, #blog-pager .pagecurrent{font-weight:bold;color: #888;}
 #blog-pager .pages{border:none;}

Style 2:


numbered page navigation style 2
 #blog-pager{clear:both;margin:30px auto;text-align:center; padding: 7px;}
.blog-pager {background: none;}
.displaypageNum a,.showpage a,.pagecurrent{padding: 5px 10px;margin-right:5px; color: #F4F4F4; background-color:#404042;-webkit-box-shadow: 0px 5px 3px -1px rgba(50, 50, 50, 0.53);-moz-box-shadow:0px 5px 3px -1px rgba(50, 50, 50, 0.53);box-shadow: 0px 5px 3px -1px rgba(50, 50, 50, 0.53);}
.displaypageNum a:hover,.showpage a:hover, .pagecurrent{background:#EC8D04;text-decoration:none;color: #fff;}
#blog-pager .showpage, #blog-pager, .pagecurrent{font-weight:bold;color: #000;}
 .showpageOf{display:none!important}
#blog-pager .pages{border:none;-webkit-box-shadow: 0px 5px 3px -1px rgba(50, 50, 50, 0.53);-moz-box-shadow:0px 5px 3px -1px rgba(50, 50, 50, 0.53);box-shadow: 0px 5px 3px -1px rgba(50, 50, 50, 0.53);}

Style 3:


numbered page navigation style 3
 #blog-pager{clear:both;margin:30px auto; padding: 7px; text-align:center;font-size: 11px;background-image: -webkit-gradient(linear,left bottom,left top,color-stop(0, #000000),color-stop(1, #292929));background-image: -o-linear-gradient(top, #000000 0%, #292929 100%);background-image: -moz-linear-gradient(top, #000000 0%, #292929 100%);background-image: -webkit-linear-gradient(top, #000000 0%, #292929 100%);background-image: -ms-linear-gradient(top, #000000 0%, #292929 100%);background-image: linear-gradient(to top, #000000 0%, #292929 100%); padding: 6px;-webkit-border-radius: 3px;-moz-border-radius: 3px;border-radius: 3px;}
.blog-pager {background: none;}
.displaypageNum a,.showpage a,.pagecurrent{padding: 3px 10px;margin-right:5px; color: #fff;}
.displaypageNum a:hover,.showpage a:hover,.pagecurrent{background-image: -webkit-gradient(linear,left bottom,left top,color-stop(0, #59A2CF),color-stop(1, #D9EAFF));background-image: -o-linear-gradient(top, #59A2CF 0%, #D9EAFF 100%);background-image: -moz-linear-gradient(top, #59A2CF 0%, #D9EAFF 100%);background-image: -webkit-linear-gradient(top, #59A2CF 0%, #D9EAFF 100%);background-image: -ms-linear-gradient(top, #59A2CF 0%, #D9EAFF 100%);background-image: linear-gradient(to top, #59A2CF 0%, #D9EAFF 100%);text-decoration: none;color: #000;-webkit-border-radius: 3px;-moz-border-radius: 3px;border-radius: 3px;}
.showpageOf{display:none!important}.blog-pager-older-link, .home-link, .blog-pager-newer-link {background: transparent;}
a.blog-pager-older-link, a.home-link, a.blog-pager-newer-link {color: #fff;}
#blog-pager .pages{border:none;background: none;}

Style 4:


numbered page navigation style 4
#blog-pager{clear:both;margin:30px auto;text-align:center; padding: 7px;}
.blog-pager {background: none;}
.displaypageNum a,.showpage a,.pagecurrent{font-size: 14px;padding: 5px 12px;margin-right:5px; color: #666; background-color:#eee;}
.displaypageNum a:hover,.showpage a:hover, .pagecurrent{background:#359BED;text-decoration:none;color: #fff;}
#blog-pager .pagecurrent{font-weight:bold;color: #fff;background:#359BED;}
 .showpageOf{display:none!important}
#blog-pager .pages{border:none;}

Style 5


numbered page navigation style 5
#blog-pager{clear:both;margin:30px auto;text-align:center; padding: 7px; }
.blog-pager {background: none;}
.displaypageNum a,.showpage a,.pagecurrent{font-size: 13px;padding: 5px 12px;margin-right:5px; color: #3E5801; background-color:#E0EDC1;}
.displaypageNum a:hover,.showpage a:hover, .pagecurrent{background:#FEF6DF;text-decoration:none;color: #E16800;}
#blog-pager .pagecurrent{font-weight:bold;color: #D25E71;background:#FFDEDF;}
 .showpageOf{display:none!important}
#blog-pager .pages{border:none;}

Style 6


numbered page navigation style 6
#blog-pager{clear:both;margin:30px auto;text-align:center; padding: 7px; }
.blog-pager {background: none;}
.displaypageNum a,.showpage a,.pagecurrent{font-size: 13px;padding: 5px 12px;margin-right:5px; color: #AD0B00; background-color:#FAB001;}
.displaypageNum a:hover,.showpage a:hover, .pagecurrent{background:#DB4920;text-decoration:none;color: #fff;}
#blog-pager .pagecurrent{font-weight:bold;color: #fff;background:#DB4920;}
 .showpageOf{display:none!important}
#blog-pager .pages{border:none;}

Style 7


numbered page navigation style 7
#blog-pager{clear:both;margin:30px auto;text-align:center; padding: 7px; }
.blog-pager {background: none;}
.displaypageNum a,.showpage a,.pagecurrent{font-size: 12px;padding: 5px 12px;margin-right:5px; color: #222; background-color:#eee; border: 1px solid #EEEEEE;}
.displaypageNum a:hover,.showpage a:hover, .pagecurrent{background:#E5E5E5;text-decoration:none;color: #222;}
#blog-pager .pagecurrent{font-weight:bold;color: #fff;background:#DB4920;}
 .showpageOf{display:none!important}
#blog-pager .pages{border:none;}
Note: if you want to hide the "First" and "Last" buttons add this line below the CSS code:
.firstpage, .lastpage {display: none;}

2. Adding The Script


Now find (CTRL + F) this tag:
</body>
UPDATED! Working version for more than 500 posts:

Add the following script just above it:
<b:if cond='data:blog.pageType != &quot;item&quot;'>
<b:if cond='data:blog.pageType != &quot;static_page&quot;'>
<script type='text/javascript'>
  /*<![CDATA[*/
    var perPage=7;
    var numPages=6;
    var firstText ='First';
    var lastText ='Last';
    var prevText ='« Previous';
    var nextText ='Next »';
    var urlactivepage=location.href;
    var home_page="/";
  /*]]>*/
</script>
  <script src="https://bloggingtipsandtrix.googlecode.com/svn/new-page-navigation.js"/>
</b:if>
</b:if>

Configuration

After installing, you might want to change these default settings:
perPage: 7,
numPages: 6,
var firstText ='First';
var lastText ='Last';
var prevText ='« Previous';
var nextText ='Next »';
}
perPage: how many posts will be shown in each page (7). This value has to be the same as the number of posts on the main page. Otherwise, add the same number by going to "Settings" > "Formatting" and type it in the "Show at most" field, then click on the "Save Settings" button.

numPages: how many pages will be shown in the page navigation (6)

To replace the 'First', 'Last', "« Previous" and "Next »" texts, just type your own within the quotes.

Labels fix:


By default, Blogger will show 20 posts on label pages. To make this widget appear on label pages, we will have to cut down this down to the value that we gave for the perPage variable.

Find each occurrence of the following code snippet:
expr:href='data:label.url'
Replace it with this one below:
expr:href='data:label.url + "?&amp;max-results=7"'
Here 7 is the number of posts to be displayed per page.
Click on the Save Template button and that's it! Enjoy!
Reference:helplogger

Flash Animated Label Cloud Widget For Blogger

add animated  label cloud
Hello there! I was thinking to change the way I presented my labels and finally found  a way to make it. This is called flash animated label cloud  for blogger and this is awesome compared to show blogger  labels in alternatively. This widget works on  Word Press, and now it is available for Blogspot blog.

In this widget, we access label tags randomly by your mouse hover in flash mode to see the animation begin, the labels are animated around a sphere.  And the beauty of this widget is you can customize very easily.

 Have a glance of  my sidebar to see the live demo!

Flash Animated Label Cloud Widget For Blogger 


Go to Blogger Dashboard >> Lay-out
Click the Add a Gadget button
Select HTML/Javascript button
Inside the box, paste the code below
<script type="text/javascript">
/*<![CDATA[*/
var bloggingtipsandtrixFlashLabelSettings = {
    blogurl        : "http://codes2tipsandtricks.blogspot.com/",
    color          : "000000",
    hoverColor     : "333333",
    backgroundColor: "FFFFFF",
    size           : 12,
    speed          : 100,
    width          : 250,
    height         : 300,
    transparency   : true
};
/*]]>*/
</script>
<script type="text/javascript" src="https://bloggingtipsandtrix.googlecode.com/svn/flash-label-cloud.js"></script>

You can customize the above code only those highlighted one like the blog URL (replace it with your blog url), color of the text, background color, size of the text, speed, width and its height.

Click Save and you're done!

Smoke Effect On Mouse Clicking

Hello brothers out there! have you seen a smoke effect upon mouse clicking  on any part of the blog you  had visited try this this very simple tutorial to make some difference of your blog!
add smoke effect on mouse click


Go to Blogger Dashboard
Click  Template >> Edit HTML
Look for the code below

Click  Template >> Edit HTML
Look for the code below

</head>

Just above that code, paste the code below,

<script type="text/javascript">
// <![CDATA[
var smokeyness=100; // how much smoke is on the screen (more will slow the script down)
var density=40; // how 'big' is the smoke

/****************************
* JavaScript Smokey Cursor  *
* Bloggingtipsandtrix  *
****************************/

var swide=800;
var shigh=600;
var toke=new Array();
var tokex=new Array();
var tokedx=new Array();
var tokey=new Array();
var nicotine=new Array();
var mousedown=false;
var x=400;
var y=300;
var sleft=sdown=0;
var ie_version=(navigator.appVersion.indexOf("MSIE")!=-1)?parseFloat(navigator.appVersion.split("MSIE")[1]):false;

function addLoadEvent(funky) {
  var oldonload=window.onload;
  if (typeof(oldonload)!='function') window.onload=funky;
  else window.onload=function() {
    if (oldonload) oldonload();
    funky();
  }
}

addLoadEvent(puff);

function puff() { if (document.getElementById) {
  var i, fag;
  for (i=0; i<smokeyness; i++) {
    fag=document.createElement("div");
    toke[i]=fag.style;
    toke[i].position="absolute";
    toke[i].backgroundColor="transparent";
    toke[i].font="bold "+density+"px Tahoma, Geneva, sans-serif";
    toke[i].color="rgba(234,234,234,0.033)";
    toke[i].zIndex="9999";
    toke[i].pointerEvents="none";
    toke[i].visibility="hidden";
    fag.appendChild(document.createTextNode(String.fromCharCode('0x25CF')));

    document.body.appendChild(fag);
    tokey[i]=false;
  }
  set_scroll();
  set_width();
  setInterval(drag, 50);
}}

function drag() {
  var c;
  if (mousedown) for (c=0; c<smokeyness; c++) if (tokey[c]===false) {
    toke[c].left=(tokex[c]=x-density/2)+"px";
    toke[c].top=(tokey[c]=y-density)+"px";
    toke[c].visibility="visible";
    tokedx[c]=(c%2?1.5:-1.5)*Math.random();
    nicotine[c]=80;
    break;
  }
  for (c=0; c<smokeyness; c++) if (tokey[c]!==false) smoke_rising(c);
}


document.onmousedown=function(){set_scroll();if(ie_version)setTimeout('mousedown=true', 51);else mousedown=true;};
document.onmouseup=function(){mousedown=false};

function smoke_rising(i) {
  var cancer;
  tokey[i]-=4+i%3;
  tokex[i]+=tokedx[i]-0.5+Math.random();
  if (tokey[i]>sdown-density*2 && tokex[i]>sleft && tokex[i]<sleft+swide-density && (nicotine[i]+=2)<256) {
    cancer=nicotine[i].toString(16);
    cancer="#"+cancer+cancer+cancer;
    if (ie_version && ie_version<10) toke[i].filter="Glow(Color="+cancer+",Strength="+Math.floor(nicotine[i]/5)+")";
    else if (ie_version) toke[i].textShadow='#000000 0px 0px '+Math.floor(nicotine[i]/5)+'px';
    else toke[i].textShadow=cancer+' 0px 0px '+Math.floor(nicotine[i]/5)+'px';
    toke[i].top=tokey[i]+"px";
    toke[i].left=tokex[i]+"px";
  }
  else {
    toke[i].visibility="hidden";
    tokey[i]=false;
  }
}

document.onmousemove=mouse;
function mouse(e) {
  if (e) {
    y=e.pageY;
    x=e.pageX;
  }
  else {
    set_scroll();
    y=event.y+sdown;
    x=event.x+sleft;
  }
}

window.onresize=set_width;
function set_width() {
  var sw_min=999999;
  var sh_min=999999;
  if (document.documentElement && document.documentElement.clientWidth) {
    if (document.documentElement.clientWidth>0) sw_min=document.documentElement.clientWidth;
    if (document.documentElement.clientHeight>0) sh_min=document.documentElement.clientHeight;
  }
  if (typeof(self.innerWidth)=='number' && self.innerWidth) {
    if (self.innerWidth>0 && self.innerWidth<sw_min) sw_min=self.innerWidth;
    if (self.innerHeight>0 && self.innerHeight<sh_min) sh_min=self.innerHeight;
  }
  if (document.body.clientWidth) {
    if (document.body.clientWidth>0 && document.body.clientWidth<sw_min) sw_min=document.body.clientWidth;
    if (document.body.clientHeight>0 && document.body.clientHeight<sh_min) sh_min=document.body.clientHeight;
  }
  if (sw_min==999999 || sh_min==999999) {
    sw_min=800;
    sh_min=600;
  }
  swide=sw_min;
  shigh=sh_min;
}

window.onscroll=set_scroll;
function set_scroll() {
  if (typeof(self.pageYOffset)=='number') {
    sdown=self.pageYOffset;
    sleft=self.pageXOffset;
  }
  else if (document.body && (document.body.scrollTop || document.body.scrollLeft)) {
    sdown=document.body.scrollTop;
    sleft=document.body.scrollLeft;
  }
  else if (document.documentElement && (document.documentElement.scrollTop || document.documentElement.scrollLeft)) {
    sleft=document.documentElement.scrollLeft;
    sdown=document.documentElement.scrollTop;
  }
  else {
    sdown=0;
    sleft=0;
  }
}
// ]]>
</script>

Save your template and you're done.Congratulations!
Before I will finish this tutorial  try to visit related topics below:

1. How To Add Snow Effects In Blogger


2.Add Comet Or Shooting Star Effect In Blogger


3. Add Groovy Effect In Blogger


God Bless And More Power!!!
Reference;Mf2fm

How to Add Snow Effects in Blogger

Falling snow effect is cool for blog not only for Christmas season but even in other seasons as well . The effects are in  white dots that would float down the page but  you can  also customize the color of the snow .We will make this tweak more simple than other tutorials. Just follow the steps below.


add snow falling effects in blogger

 How to Add Snow Effects in Blogger


Go to Blogger Dashboard
Click  Template >> Edit HTML
Look for the code below

</head>

Just above that code, paste the code below

<script type="text/javascript">
// <![CDATA[
var speed=33; // lower number for faster
var flakes=100; // number of flakes
var colour="#ffffff"; // colour of flakes
var slush=20; // set to '0' for no slush or otherwise set to height at which slush melts
var over_or_under="over"; // set to "over" for snow to always be on top, or "under" to allow it to float behind other objects

/***************************\
*     Let It Snow Effect    *
*   Bloggingtipsandtrix   *
* DON'T EDIT BELOW THIS BOX *
\***************************/
var flks=new Array();
var flkx=new Array();
var flky=new Array();
var fldy=new Array();
var slss=new Array();
var slsh=new Array();
var swide, shigh, boddie;

function addLoadEvent(funky) {
  var oldonload=window.onload;
  if (typeof(oldonload)!='function') window.onload=funky;
  else window.onload=function() {
    if (oldonload) oldonload();
    funky();
  }
}

addLoadEvent(baby_its_cold_outside);

function baby_its_cold_outside() { if (document.getElementById) {
  var i;
  boddie=document.createElement("div");
  i=boddie.style;
  i.position="fixed";
  i.top="0px";
  i.left="0px";
  i.overflow="visible";
  i.width="1px";
  i.height="1px";
  i.backgroundColor="transparent";
  document.body.appendChild(boddie);
  set_width();
  for (var i=0; i<flakes; i++) {
    flks[i]=createDiv(3, 3, colour);
    flkx[i]=3*Math.floor(Math.random()*swide/3);
    flky[i]=Math.floor(Math.random()*shigh);
    fldy[i]=2+Math.floor(Math.random()*4);
    flks[i].style.left=flkx[i]+"px";
    flks[i].style.top=flky[i]+"px";
flks[i].style.zIndex=(over_or_under=="over")?"1001":"0";
    boddie.appendChild(flks[i]);
  }
  setInterval("let_it_snow()", speed);
}}

function createDiv(height, width, colour) {
  var div=document.createElement("div");
  div.style.position="absolute";
  div.style.height=height+"px";
  div.style.width=width+"px";
  div.style.overflow="hidden";
  div.style.backgroundColor=colour;
  return (div);
}

window.onresize=set_width;
function set_width() {
  var sw_min=999999;
  var sh_min=999999;
  if (document.documentElement && document.documentElement.clientWidth) {
    if (document.documentElement.clientWidth>0) sw_min=document.documentElement.clientWidth;
    if (document.documentElement.clientHeight>0) sh_min=document.documentElement.clientHeight;
  }
  if (typeof(self.innerWidth)=='number' && self.innerWidth) {
    if (self.innerWidth>0 && self.innerWidth<sw_min) sw_min=self.innerWidth;
    if (self.innerHeight>0 && self.innerHeight<sh_min) sh_min=self.innerHeight;
  }
  if (document.body.clientWidth) {
    if (document.body.clientWidth>0 && document.body.clientWidth<sw_min) sw_min=document.body.clientWidth;
    if (document.body.clientHeight>0 && document.body.clientHeight<sh_min) sh_min=document.body.clientHeight;
  }
  if (sw_min==999999 || sh_min==999999) {
    sw_min=800;
    sh_min=600;
  }
  swide=sw_min-3;
  shigh=sh_min;
  if (slush) {
    if (swide/3>slss.length) for (i=slss.length; i<swide/3; i++) {
      if (!slsh[i]) slsh[i]=3;
      slss[i]=createDiv(slsh[i], 3, colour);
      boddie.appendChild(slss[i]);
    }
    for (i=0; i<swide/3; i++) {
      slss[i].style.height=slsh[i]+"px";
      slss[i].style.top=shigh-slsh[i]+"px";
      slss[i].style.left=3*i+"px";
    }
    if (i<slss.length && slss[i].style.left!="-3px") for (; i<slss.length; i++) slss[i].style.left="-3px";
  }
}

function let_it_snow(c) {
  var i, x, o=0, z=0;
  for (i=0; i<flakes; i++) {
    flky[i]+=fldy[i];
x=Math.floor(flkx[i]/3);
    if (slush) {
      o+=slsh[x];
      if (flky[i]>=shigh-slsh[x]) {
        if (x<swide && slsh[x]>slsh[x+1]+3) x++;
        else if (x>0 && slsh[x]>slsh[x-1]+3) x--;
        slss[x].style.top=shigh-(slsh[x]+=3)+"px";
        slss[x].style.height=slsh[x]+"px";
flky[i]=shigh;
 }
    }
    if (flky[i]>=shigh || flkx[i]>swide) {
 flky[i]=0;
 fldy[i]=2+Math.floor(Math.random()*4);
 flkx[i]=3*Math.floor(Math.random()*swide/3);
 flks[i].style.left=flkx[i]+"px";
 z++;
}
flks[i].style.top=flky[i]+"px";
  }
  if (o>flakes*slush) for (i=0; i<slsh.length; i++) if (slsh[i]>3) slsh[i]--;
  if (z || o>flakes*slush) set_width();
}
// ]]>
</script>

Note: Just change the color #ffffff to change the color of the snow.
Save Template and you're done with the tutorial.
From mf2fm

Add Comet or Shooting Star Effect in Blogger

Blogging platform is very versatile in terms of different effects through using Javascript. Previously, we featured here the fireworks, star space  and the groovy effect and today we will share to you this shooting effect in Blogger.
add shooting star effect in blogger

 How to Add Shooting Star or Comet Effects in Blogger


Go to Blogger Dashboard
Click  Template >> Edit HTML
Look for the code below

</head>

Just above that code, paste the code below

<script type="text/javascript">
// <![CDATA[
var speed=25; // how fast - smaller is faster
var how_often=10; // average time between re-appearances of a comet (in seconds)
var how_many=10; // maximum number of comets in flight
var colours=new Array("#ff0", "#f93", "#f60", "#e93", "#e94", "#da5", "#da6", "#cb7", "#cb8", "#cc9", "#dcb", "#ddd");
// above line lists colours for the comet and its tail (can be as long or short as you like)

/****************************
* Shooting Star/Comet Effect*
*Bloggingtipsandtrix*
* DON'T EDIT BELOW THIS BOX *
****************************/

var dx=new Array();
var dy=new Array();
var xpos=new Array();
var ypos=new Array();
var comets=new Array();
var swide=800;
var shigh=600;
var tail=colours.length;
var boddie=false;

function addLoadEvent(funky) {
  var oldonload=window.onload;
  if (typeof(oldonload)!='function') window.onload=funky;
  else window.onload=function() {
    if (oldonload) oldonload();
    funky();
  }
}

addLoadEvent(whooosh);

function whooosh() { if (document.getElementById) {
  var i;
  boddie=document.createElement("div");
  boddie.style.position="fixed";
  boddie.style.top="0px";
  boddie.style.left="0px";
  boddie.style.overflow="visible";
  boddie.style.width="1px";
  boddie.style.height="1px";
  boddie.style.backgroundColor="transparent";
  document.body.appendChild(boddie);
  set_width();
  for (i=0; i<how_many; i++) {
    write_comet(i*tail);
setTimeout('launch('+(i*tail)+')', Math.max(1000*i));
  }
}}

function write_comet(a) {
  var i, s;
  for (i=0; i<tail; i++) {
    s=2+(i<tail/4)+2*!i;
comets[i+a]=div(s, s);
comets[i+a].style.backgroundColor=colours[i];
boddie.appendChild(comets[i+a]);
  }
}

function div(w, h) {
  var d=document.createElement("div");
  d.style.position="absolute";
  d.style.overflow="hidden";
  d.style.width=w+"px";
  d.style.height=h+"px";
  return (d);
}

function stepthrough(a) {
  var i;
  if (Math.random()<0.008||ypos[a]+dy[a]<5||xpos[a]+dx[a]<5||xpos[a]+dx[a]>=swide-5||ypos[a]+dy[a]>=shigh-5) {
for (i=0; i<tail; i++) setTimeout('comets['+(i+a)+'].style.visibility="hidden"', speed*(tail-i));
setTimeout('launch('+a+')', Math.max(1000, 2000*Math.random()*how_often));
  }
  else setTimeout('stepthrough('+a+')', speed);
  for (i=tail-1; i>=0; i--) {
if (i) {
      xpos[i+a]=xpos[i+a-1];
      ypos[i+a]=ypos[i+a-1];
}
else {
 xpos[i+a]+=dx[a];
      ypos[i+a]+=dy[a];
}
    comets[i+a].style.left=xpos[i+a]+"px";
    comets[i+a].style.top=ypos[i+a]+"px";
  }
}

function launch(a) {
  var i;
  dx[a]=(Math.random()>0.5?1:-1)*(1+Math.random()*3);
  dy[a]=(Math.random()>0.5?1:-1)*((7-dx[a])/3+Math.random()*(dx[a]+5)/3);
  xpos[a]=2*tail*dx[a]+Math.round(Math.random()*(swide-4*tail*dx[a]));
  ypos[a]=2*tail*dy[a]+Math.round(Math.random()*(shigh-4*tail*dy[a]));
  for (i=0; i<tail; i++) {
    xpos[i+a]=xpos[a];
    ypos[i+a]=ypos[a];
comets[i+a].style.visibility="visible";
  }
  stepthrough(a);
}

window.onresize=set_width;
function set_width() {
  var sw_min=999999;
  var sh_min=999999;
  if (document.documentElement && document.documentElement.clientWidth) {
    if (document.documentElement.clientWidth>0) sw_min=document.documentElement.clientWidth;
    if (document.documentElement.clientHeight>0) sh_min=document.documentElement.clientHeight;
  }
  if (typeof(self.innerWidth)!="undefined" && self.innerWidth) {
    if (self.innerWidth>0 && self.innerWidth<sw_min) sw_min=self.innerWidth;
    if (self.innerHeight>0 && self.innerHeight<sh_min) sh_min=self.innerHeight;
  }
  if (document.body.clientWidth) {
    if (document.body.clientWidth>0 && document.body.clientWidth<sw_min) sw_min=document.body.clientWidth;
    if (document.body.clientHeight>0 && document.body.clientHeight<sh_min) sh_min=document.body.clientHeight;
  }
  if (sw_min==999999 || sh_min==999999) {
    sw_min=800;
    sh_min=600;
  }
  swide=sw_min;
  shigh=sh_min;
}
// ]]>
</script>

Save  your Template and Bravo!
From: mf2fm

Add Groovy Effect in Blogger

add groovy effect in blogger
Groovy  is a slang colloquialism popular during the 1960s and 1970s. It is roughly synonymous with words such as "cool," "excellent," "fashionable," or "amazing," depending on context. Since other bloggers have this kind of niche or just want to add this kind of effect  in their blog. I was convinced to make an article and share it to my readers as well. See the background of this page for a live demo.
Music video credit.


Also Read: Add Star Space Warp Effect In Blogger

 How to Add Groovy Effect in Blogger


Go to Blogger Dashboard
Click  Template >> Edit HTML
Look for the code below

</head>

Just above that code, paste the code below
<script type="text/javascript">
// <![CDATA[
var border=100; // how wide is each border in pixels
var effects=3; // how many of the effect are on the page
var speed=50; // how fast is the animation (lower is faster)
var colours=new Array("#9cf", "#c9f", "#fc9", "#f9c", "#cf9", "#9fc", "#6ff", "#f6f", "#ff6");
// above line lists colours for the groovy effect (the list can be as long or short as you like)

/****************************
*1970s Groovy WebPage Effect*
*  Bloggingtipsandtrix  *
****************************/

function addLoadEvent(funky) {
  var oldonload=window.onload;
  if (typeof(oldonload)!='function') window.onload=funky;
  else window.onload=function() {
    if (oldonload) oldonload();
    funky();
  }
}

addLoadEvent(yowzah);

var swide, shigh, boddie;
var h=new Array();
var v=new Array();
var op=1/(effects+1);
function yowzah() { if (document.getElementById) {
  var i, d, s;
  boddie=document.createElement("div");
  s=boddie.style;
  s.position="fixed";
  s.backgroundColor="transparent";
  s.top="0px";
  s.left="0px";
  s.width="100%";
  s.zIndex="-1";
  set_width();
  i=document.body.style.backgroundColor;
  if (document.body.parentNode) {
    if (i) document.body.parentNode.style.backgroundColor=i;
    document.body.style.backgroundColor="transparent";
  }
  document.body.insertBefore(boddie, document.body.firstChild);
  for (i=0; i<effects*10; i+=10) {
    d=document.createElement("div");
    s=d.style;
    s.left="0px";
s.width="100%";
    h[i]=Math.floor(Math.random()*(shigh-border)/3);
    h[i+1]=shigh-Math.floor(Math.random()*(shigh-border)/3);
    h[i+2]=(Math.random()<0.5?1:-1)*scat(0);
    h[i+3]=(Math.random()<0.5?1:-1)*scat(h[i+2]);
    s.position="absolute";
    s.top=h[i]+"px";
    s.height=(h[i+1]-h[1])+"px";
    s.borderStyle="solid";
    s.borderWidth=border+"px 0px";
    jazzy(s, 'borderTopColor');
jazzy(s, 'borderBottomColor');
    jazzy(s, 'backgroundColor');
    s.opacity=op;
    if (navigator.appName=="Microsoft Internet Explorer") s.filter="alpha(opacity="+(100*op)+")";
    h[i+5]=s;
    boddie.appendChild(d);
  }
  for (i=0; i<effects*10; i+=10) {
    d=document.createElement("div");
    s=d.style;
s.top="0px";
    s.height="100%";
    v[i]=Math.floor(Math.random()*(swide-border)/3);
    v[i+1]=swide-Math.floor(Math.random()*(swide-border)/3);
    v[i+2]=(Math.random()<0.5?1:-1)*scat(0);
    v[i+3]=(Math.random()<0.5?1:-1)*scat(v[i+2]);
    s.position="absolute";
    s.left=v[i]+"px";
    s.width=(v[i+1]-v[i])+"px";
    s.borderStyle="solid";
    s.borderWidth="0px "+border+"px";
    jazzy(s, 'borderLeftColor');
    jazzy(s, 'borderRightColor');
    jazzy(s, 'backgroundColor');
    if (navigator.appName=="Microsoft Internet Explorer") s.filter="alpha(opacity="+(100*op)+")";
    else s.opacity=op;
    v[i+5]=s;
    boddie.appendChild(d);
  }
  setInterval('groovy()', speed);
}}

var old_jazz=false;
function jazz() {
var new_jazz;
do { new_jazz=colours[Math.floor(Math.random()*colours.length)]; }
while ( new_jazz==old_jazz );
old_jazz=new_jazz;
return (new_jazz);
}

function jazzy(hip, jive) {
var new_jive;
do { new_jive=colours[Math.floor(Math.random()*colours.length)]; }
while (new_jive==hip[jive]);
hip[jive]=new_jive;
}

function scat(no) {
var yes;
no=Math.abs(no);
do { yes=2+Math.floor(Math.random()*3); }
while ( no==yes );
return (yes);
}

function groovy() {
  var i;
  for (i=0; i<effects*10; i+=10) {
h[i]+=h[i+2];
h[i+1]+=h[i+3];
if (h[i+1]-h[i]<5) {
 h[i+4]=h[i+2];
 h[i+2]=h[i+3];
 h[i+3]=h[i+4];
 jazzy(h[i+5], 'backgroundColor');
}
    if (h[i]<-border) {
if (h[i+2]<0 && Math.random()<1/border) {
h[i+2]=scat(h[i+3]);
jazzy(h[i+5], 'borderTopColor');
}
}
if (h[i+1]>shigh) {
if (h[i+3]>0 && Math.random()<1/border) {
h[i+3]=-scat(h[i+2]);
jazzy(h[i+5], 'borderBottomColor');
}
}
h[i+5].top=h[i]+"px";
    h[i+5].height=(h[i+1]-h[i])+"px";

v[i]+=v[i+2];
v[i+1]+=v[i+3];
if (v[i+1]-v[i]<5) {
 v[i+4]=v[i+2];
 v[i+2]=v[i+3];
 v[i+3]=v[i+4];
 jazzy(v[i+5], 'backgroundColor');
}
if (v[i]<-border) {
if (v[i+2]<0 && Math.random()<1/border) {
v[i+2]=scat(v[i+3]);
jazzy(v[i+5], 'borderLeftColor');
}
}
if (v[i+1]>swide) {
if (v[i+3]>0 && Math.random()<1/border) {
v[i+3]=-scat(v[i+2]);
jazzy(v[i+5], 'borderRightColor');
}
}
v[i+5].left=v[i]+"px";
    v[i+5].width=(v[i+1]-v[i])+"px";
  }
}

window.onresize=set_width;
function set_width() {
  var sw_min=999999;
  var sh_min=999999;
  if (document.documentElement && document.documentElement.clientWidth) {
    if (document.documentElement.clientWidth>0) sw_min=document.documentElement.clientWidth;
    if (document.documentElement.clientHeight>0) sh_min=document.documentElement.clientHeight;
  }
  if (typeof(self.innerWidth)!="undefined" && self.innerWidth) {
    if (self.innerWidth>0 && self.innerWidth<sw_min) sw_min=self.innerWidth;
    if (self.innerHeight>0 && self.innerHeight<sh_min) sh_min=self.innerHeight;
  }
  if (document.body.clientWidth) {
    if (document.body.clientWidth>0 && document.body.clientWidth<sw_min) sw_min=document.body.clientWidth;
    if (document.body.clientHeight>0 && document.body.clientHeight<sh_min) sh_min=document.body.clientHeight;
  }
  if (sw_min==999999 || sh_min==999999) {
    sw_min=800;
    sh_min=600;
  }
  swide=sw_min;
  shigh=sh_min;
  boddie.style.height=shigh+"px";
}
// ]]>
</script>

Click Save Template button and congratulations!
Must Read: Add Fireworks Effect In Blogger
From: mf2fm

Adding Star Space Warp Effect in Blogger

Want to decorate your blog with star space warp? This innovation was from mf2fm and I will share to you to make your site more attractive than before. You can see it live in this page.
Also Read: Add Groovy Effect In Blogger
star warp effect in blogger

 How to Add Star Space Warp in Blogger


Go to Blogger Dashboard
Click  Template >> Edit HTML
Look for the code below

</head>

Just above that code, paste the code below
<script type="text/javascript">
// <![CDATA[
var speed=40; // lower number for faster
var warp=3; // from 1 to 10
var stars=150; // number of stars
var colours=new Array("#60f", "#0f6", "#39f"); // colours of stars
var position=0; // set to '0' for foreground and '-1' for stars to appear in the background, behind text on the page

/****************************
*      Star Warp Effect     *
*   Bloggingtipsandtrix    *
****************************/
var strs=new Array();
var strx=new Array();
var stry=new Array();
var stdx=new Array();
var stdy=new Array();
var strz=new Array();
var swide=800;
var shigh=600;
warp=1+warp/125;

if (typeof('addRVLoadEvent')!='function') function addRVLoadEvent(funky) {
  var oldonload=window.onload;
  if (typeof(oldonload)!='function') window.onload=funky;
  else window.onload=function() {
    if (oldonload) oldonload();
    funky();
  }
}

addRVLoadEvent(initiate_hyperjump);

function initiate_hyperjump() { if (document.getElementById) {
  var i, temp;
  boddie=document.createElement("div");
  boddie.style.position="fixed";
  boddie.style.top="0px";
  boddie.style.left="0px";
  boddie.style.width="1px";
  boddie.style.height="1px";
  boddie.style.overflow="visible";
  boddie.style.backgroundColor="transparent";
  boddie.style.zIndex=position;
  i=document.body.style.backgroundColor;
  if (document.body.parentNode) {
    if (i) document.body.parentNode.style.backgroundColor=i;
    document.body.style.backgroundColor="transparent";
  }
  document.body.insertBefore(boddie, document.body.firstChild);
  set_width();
  for (i=0; i<stars; i++) {
    strs[i]=document.createElement("div");
    strs[i].style.color=colours[i%colours.length];
strs[i].style.backgroundColor="transparent";
    strs[i].style.position="absolute";
strs[i].appendChild(document.createTextNode("*"));
strs[i].style.font="13px monospace";
    stdy[i]=Math.random()*6-3;
    stdx[i]=Math.random()*8-4;
    temp=Math.random()*100;
    strx[i]=swide/2+temp*stdx[i];
    stry[i]=shigh/2+temp*stdy[i];
    if (Math.abs(stdx[i])+Math.abs(stdy[i])>5) strz[i]=13;
    else if (Math.abs(stdx[i])+Math.abs(stdy[i])>3) strz[i]=7;
    else strz[i]=2;
strs[i].style.fontSize=strz[i]+"px";
    boddie.appendChild(strs[i]);
  }
  setInterval("warp_drive()", speed);
}}

function warp_drive() {
  var i;
  for (i=0; i<stars; i++) {
    stry[i]+=stdy[i];
    strx[i]+=stdx[i];
    stdx[i]*=warp;
    stdy[i]*=warp;
    if (stry[i]>0 && stry[i]<shigh && strx[i]>0 && strx[i]<swide) {
 if (Math.abs(stdx[i])+Math.abs(stdy[i])>strz[i]) strs[i].style.fontSize=++strz[i]+"px";
      strs[i].style.left=strx[i]+"px";
      strs[i].style.top=stry[i]+"px"
    }
    else {
      strx[i]=swide/2;
      stry[i]=shigh/2;
      strx[i]+=3*(stdx[i]=Math.random()*8-4);
      stry[i]+=3*(stdy[i]=Math.random()*6-3);
 if (Math.abs(stdx[i])+Math.abs(stdy[i])>5) strz[i]=13;
      else if (Math.abs(stdx[i])+Math.abs(stdy[i])>3) strz[i]=7;
      else strz[i]=2;
 strs[i].style.fontSize=strz[i]+"px";
    }
  }
}

window.onresize=set_width;
function set_width() {
  var sw_min=999999;
  var sh_min=999999;
  if (document.documentElement && document.documentElement.clientWidth) {
    if (document.documentElement.clientWidth>0) sw_min=document.documentElement.clientWidth;
    if (document.documentElement.clientHeight>0) sh_min=document.documentElement.clientHeight;
  }
  if (typeof(self.innerWidth)!="undefined" && self.innerWidth) {
    if (self.innerWidth>0 && self.innerWidth<sw_min) sw_min=self.innerWidth;
    if (self.innerHeight>0 && self.innerHeight<sh_min) sh_min=self.innerHeight;
  }
  if (document.body.clientWidth) {
    if (document.body.clientWidth>0 && document.body.clientWidth<sw_min) sw_min=document.body.clientWidth;
    if (document.body.clientHeight>0 && document.body.clientHeight<sh_min) sh_min=document.body.clientHeight;
  }
  if (sw_min==999999 || sh_min==999999) {
    sw_min=800;
    sh_min=600;
  }
  swide=sw_min;
  shigh=sh_min;
}
// ]]>
</script>

Save Your Template and finish!

Simple  is good bro!

How to Add a Floating Contact Us Widget in Blogger

One of my posts officially demonstrated to you a way on industry standards to include a contact us gadget in blogger. Nonetheless, you may have recognized that occasionally clients think that it hard to place your contact us page join on the grounds that it is placed some place where it counts into your footer. Suppose it is possible that you are running an ecommerce website on blogger and your client needs to send a brisk inquiry email to the backing to discover some longing data. Since, your contact us page is placed where it counts the footer he may not send any email and would move to an alternate better site taking ceaselessly all the conceivable outcomes of making another deal. A straightforward answer for this issue is to have a gliding contact us gadget. Today in this article, we will demonstrate to you proper methodologies to include a floating contact us gadget in blogger.Thanks for my friend in bloggerlab for sharing this very nice post. Have a look  here for a demo
add floating contact us  widget

Adding a Floating Contact Us Widget in Blogger


Step 1.  Go to Blogger Dashboard  >> Template
Step 2.  Click Edit  HTML button
Step 3.  Click anywhere in the HTML template editor and press (CTRL+F), this will enable a search box. Now search for the tag below
]]></b:skin>

Step 4.  And just above it paste the following CSS style sheet coding.
#btat-contact .ContactForm {
    margin: 0px!important;
}
#btat-contact .contact-form-button-submit {
    max-width: none;
    width: 100%;
    height: 35px;
    border: 0;
    background-image: none;
    background-color: #168eca;
    cursor: pointer;
    font: normal normal 13px Oswald;
    font-style: normal;
    font-weight: 400;
}
.#btat-contact .contact-form-button-submit:hover {
    background-color: #158aee;
    background-image: none;
    border: 0;
}
#btat-contact #contact {
    position: fixed;
    bottom: 0;
    right: 1%;
    background-color: #EEE;
    color: #555;
    width: 300px;
    z-index: 1.0E+15;
}
#btat-contact #contact .contact-form-widget {
    padding: 30px;
    display: none;
}
#btat-contact #contact {
    position: fixed;
    bottom: 0;
    right: 1%;
    background-color: #EEE;
    color: #555;
    width: 300px;
    z-index: 1.0E+15;
}
#btat-contact #contact h2.title {
    margin: 0px;
    font-weight: 400;
    background-color: #168eca;
    color: #FFF;
    padding: 8px 15px;
    font-size: 16px;
    cursor: pointer;
    letter-spacing: 3px;
    text-align: center;
}
#btat-contact #contact h2.title .fa {
    position: absolute;
    left: 10px;
    top: 12px;
}
#btat-contact #contact .contact-form-widget {
    width: 240px;
    padding: 30px;
    display: none;
}
#btat-contact #contact * {
    transition: all 0 ease;
    -webkit-transition: all 0 ease;
    -moz-transition: all 0 ease;
    -o-transition: all 0 ease;
}
#btat-contact #contact .contact-form-name,#contact .contact-form-email,#contact .contact-form-email-message {
    background-color: #DDD;
    color: #111;
    border: 0;
    padding: 10px 5px;
    font: normal normal 13px Open Sans;
}
#l-contact .contact-form-name,.contact-form-email,.contact-form-email-message,.contact-form-widget {
    max-width: none;
    margin-bottom: 15px;
}

Step 5. Look for the </body> tag and just above it, paste the code below
<div id="btat-contact">
<b:section class='contact' id='contact' maxwidgets='1' showaddelement='yes'>
    <b:widget id='ContactForm2' locked='true' title='Contact us' type='ContactForm'>
      <b:includable id='main'>
  <b:if cond='data:title != &quot;&quot;'>
    <h2 class='title'><i class='fa fa-paper-plane'/> <data:title/></h2>
  </b:if>
  <div class='contact-form-widget'>
    <div class='form'>
      <form name='contact-form'>
        <input class='contact-form-name' expr:id='data:widget.instanceId + &quot;_contact-form-name&quot;' expr:placeholder='data:contactFormNameMsg' name='name' size='30' type='text' value=''/>
        <input class='contact-form-email' expr:id='data:widget.instanceId + &quot;_contact-form-email&quot;' expr:placeholder='data:contactFormEmailMsg' name='email' size='30' type='text' value=''/>
        <textarea class='contact-form-email-message' cols='25' expr:id='data:widget.instanceId + &quot;_contact-form-email-message&quot;' expr:placeholder='data:contactFormMessageMsg' name='email-message' rows='5'/>
        <input class='contact-form-button contact-form-button-submit' expr:id='data:widget.instanceId + &quot;_contact-form-submit&quot;' expr:value='data:contactFormSendMsg' type='button'/>
        <div style='text-align: center; max-width: 222px; width: 100%'>
          <p class='contact-form-error-message' expr:id='data:widget.instanceId + &quot;_contact-form-error-message&quot;'/>
          <p class='contact-form-success-message' expr:id='data:widget.instanceId + &quot;_contact-form-success-message&quot;'/>
        </div>
      </form>
    </div>
  </div>
</b:includable>
    </b:widget>
  </b:section>
</div>
<script type='text/javascript'>
 //<![CDATA[
$( "#contact h2.title" ).click(function() {$( "#contact .contact-form-widget" ).toggle(1000);});
   //]]>
</script>

Short Customization:

Simply change the hexadecimal color 168eca to change the background color of your "send button"

Step 6. Save your template and your done.
Enjoy Blogging Buddies!

How to Add Professional Text and Image Slider In Blogger

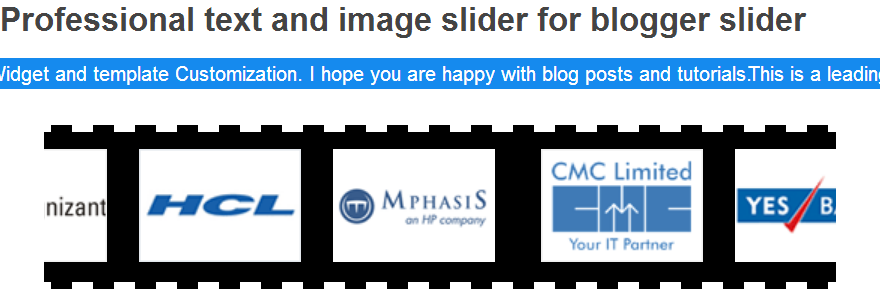
Marquee is one of the best tools to use if you want to make a text and image slider in your Blogger blog. In this post I will show on how to use this marquee tool in two different ways. First is we will make your texts slide from right to left and pause it as the mouse passes over (hover) it. Second is we will use images that slide  from right to left, pause it when mouse hover at the center part of the frame and it moves fast upon putting the mouse cursor near at the left side of the frame.
 professional text and image slider for blogger

Demo: Make Text and Image Slider Using Marquee

You may also browse some of  the posts that talks on Image Slider:

How to Make  Text Slider Using Marquee In Blogspot


Step 1. Go to Blogger Dashboard >> Template (back-up) >>Edit HTML
Step 2. Look for the code below,

</head>

Step 3. Just above that code in step 2, place the code below

<script src="https://bloggingtipsandtrix.googlecode.com/svn/marquee_slider.js" type="text/javascript">

Step 4. Save your template and your partly done
Step 5. Go back  to Blogger Dashboard >> Post or New Post
Step 6. Switch your Blogger Post editor page to HTML mode and then paste the code below for the text slider style,


<div class="slider_text" id="marqueetext"> Bloggingtipsandtrix is happy to serve you. Bloggingtipsandtrix  is happy to serve you.  Bloggingtipsandtrix  is happy to serve you. Bloggingtipsandtrix  is happy to serve you. Bloggingtipsandtrix  is happy to serve you.
</div>
<script type="text/javascript">
marqueeInit({
 uniqueid: 'marqueetext',
 style: { //style object for this marquee container (use quotes on both sides of the : as shown)
    'width': '100%',
    'height': '1.6em',
    'color': '#fff',
    'background-color': '#158aee',
    'font-family': 'sans-serif',
    'margin': '0 auto'},
      inc:1, //speed - of marquee slider.
 });

</script>

Step 7. And for the image slider, copy the code below and paste it in your Blogger post editor's page (HTML mode)
<div class="marquee_slider" id="marqueeimage">
<a href="##########" target="_blank"> <img src="***** " /> </a>
<a href="##########" target="_blank"> <img src="*****" /> </a>
<a href="##########" target="_blank"> <img src="***** " /> </a>
<a href="##########" target="_blank"> <img src="*****" /> </a>
<a href="##########" target="_blank"> <img src="***** " /> </a>
<a href="##########" target="_blank"> <img src="*****" /> </a>
<a href="##########" target="_blank"> <img src="***** " /> </a>
<a href="##########" target="_blank"> <img src="*****" /> </a>
</div>
<script type="text/javascript">
marqueeInit({
 uniqueid: 'marqueeimage',
 style: { //style object for this marquee container (use quotes on both sides of the : as shown)
    'width': '400px',
    'height': '100px',
    'color': '#fff',
    'border-top': ' 5px dashed white',
    'border-bottom': ' 5px dashed white',
    'border-left': ' 0px dashed white',
    'border-right': ' 0px dashed white',
    'background-color': '#158aee',
    'font-family': 'oswald',
    'margin': '5px auto'},
 inc:1, //speed - of marquee slider
 mouse: 'cursor driven', //mouseover behavior ('pause' 'cursor driven' or false)
 moveatleast: 4,
 neutral: 150,
 savedirection: true
});
</script>

Customization:

Replace the sign ########### with the link (url) you desired
Change the sign *****  with your image link.
Change 400px  and 100px with your preferred  image width  and height
Replace #158aee with another hexadecimal color.
Change border styles with your own and its numerical value, the bigger the number the larger its size
Change 1 to much higher number to speed up the movement of the slides.

Step 8. Save your work and your done pal. Congrats!


How to Make Text Slider in Blogger

After observing  the about page of  OLX.com, I decided to make a slider not for the image but  a slider intended for the texts. You can put this technique in your about page, in your sidebar or anywhere you like. Furthermore,  this innovation also adds professionalism to your works.  Without much words to say, let's make a texts slider for your Blogger blog!
professsional texts slider for blogger


Recommended:


Put a  Text Slider in Blogger Blog


Step 1. Go to Blogger Dashboard >> Edit HTML (back-up your Template)
Step 2. Find the code below,
</head>
Step 3. Just above that code in step 2, paste the code below,
<script src='//ajax.googleapis.com/ajax/libs/jquery/1.9.1/jquery.min.js'/>

<script>
$(document).ready(function(){
$(&#39;.timeline-item&#39;).first().addClass(&#39;active&#39;);
$(&#39;article.2006&#39;).slideToggle();
$(&#39;.timeline-item&#39;).click(function(e) {
e.preventDefault();
var clickid = $(this).attr(&#39;id&#39;);
var active = $(&#39;.timeline-item.active&#39;);
var activeid = active.attr(&#39;id&#39;);

if ( $(this).hasClass(&#39;active&#39;) ) {
return;
}
else {
active.removeClass(&#39;active&#39;);
$(this).addClass(&#39;active&#39;);
$(&quot;article.&quot;+ activeid ).slideToggle();
$(&quot;article.&quot;+ clickid ).slideToggle();
}
});

$(&quot;.carousel span:first&quot;).fadeIn();

jQuery.fn.timer = function() {
if(!$(&#39;.carousel&#39;).children(&quot;span:last-child&quot;).is(&quot;:visible&quot;)){
$(&#39;.carousel&#39;).children(&quot;span:visible&quot;)
.fadeOut()
.next(&quot;span&quot;).fadeIn();
}
else{
$(&#39;.carousel&#39;).children(&quot;span:visible&quot;)
.fadeOut()
.end().children(&quot;span:first&quot;)
.fadeIn;
$(&quot;.carousel span:first&quot;).fadeIn();
}
} // timer function end

window.setInterval(function() {
$(&#39;.carousel&#39;).timer();
}, 1500);

   });
</script>

Step 4. Look for the code ]]></b:skin> . Above it, paste the code below,
.carousel span {
width: 50%;
font-size: 40px;
text-align: center;
position: absolute;
font-family: oswald;
left: 25%;
color:#158aee;
display: none;}

Step 5. Save your Template and you're halfway done!
Every time you want to integrate this style in your post just copy the code below,
<div class="carousel">
<span style="display: none;"><a href="http://btt-testblog1.blogspot.com/">Bloggingtipsandtrix</a></span>
     <span style="display: none;">offers</span>
     <span style="display: none;">Latest Blogger tutorials</span>
     <span style="display: none;">tips</span>
     <span style="display: none;">tricks</span>
     <span style="display: none;">news</span>
     <span style="display: none;">tools and resources</span>
     <span style="display: none;">presented in more understandable</span>
     <span class="last" style="display: none;">and easy way</span>
    </div>


Customization:
Replace the italic bold texts with your own texts
You can also add link to each group of texts. See the first word Bloggingtipsandtrix as an sample.
Change also the time 1500 to speed up or slower the text to appear. The bigger the numerical value the slower it appears and smaller the numerical value the earlier it appears.
Finally, for the css above, you can change the font size 40px. Greater numerical value the bigger its size and vice versa. And the text color #158aee. Select  variuos hexadecimal color for your guide.

Create Multi Level Drop Down Menu In Blogger

 A good day to all of us brothers in this field of work.This is our 2nd drop down menu so far, here we will be  sharing another cool drop down menu designed by dynamicdrive and bloggerized by mybloggertricks.This is a multi level drop down menu  wherein it will help you more in  organizing your blog important links, and also it will help your readers to easily navigate through your blog since it is our dream to let our users impress our blog as they land on it.The HTML structure of this menu is so easy as you have to use tags, but you have to add a different ul id for a new drop down, that's the little negative side of this  drop down menu. But don't worry pal, just follow below steps carefully and you will successfully integrate  this menu to your blog.
add multi drop down menu


Create Multi Level Drop Down Menu In Blogger


Step 1. Go to Blogger Dashboard
Step 2. Click Lay- out
Step 3. Hit the Add a Gadget button >> Select the HTML/Javascript
Step 4. In the empty/blank space provided, place the CSS/scriptscript below
<script src='http://mybloggertricks.googlecode.com/files/dropdownddlevel.js' type='text/javascript'></script>
<style>
/* ######### Drop Down Menu by www.Bloggingtipsandtrix.blogspot.com ######### */

.ddsubmenustyle, .ddsubmenustyle div{ /*topmost and sub DIVs, respectively*/
font: normal 13px Verdana;
margin: 0;
padding: 0;
position: absolute;
left: 0;
top: 0;
list-style-type: none;
background: white;
border: 1px solid black;
border-bottom-width: 0;
visibility: hidden;
z-index: 100;
}
.ddsubmenustyle ul{
margin: 0;
padding: 0;
position: absolute;
left: 0;
top: 0;
list-style-type: none;
border: 0px none;
}
.ddsubmenustyle li a{
display: block;
width: 170px; /*width of menu (not including side paddings)*/
color: black;
background-color: lightyellow;
text-decoration: none;
padding: 4px 5px;
border-bottom: 1px solid black;
}
* html .ddsubmenustyle li{ /*IE6 CSS hack*/
display: inline-block;
width: 170px; /*width of menu (include side paddings of LI A*/
}
.ddsubmenustyle li a:hover{
background-color: black;
color: white;
}
.downarrowpointer{ /*CSS for "down" arrow image added to top menu items*/
padding-left: 4px;
border: 0;
}
.rightarrowpointer{ /*CSS for "right" arrow image added to drop down menu items*/
position: absolute;
padding-top: 3px;
left: 100px;
border: 0;
}
.ddiframeshim{
position: absolute;
z-index: 500;
background: transparent;
border-width: 0;
width: 0;
height: 0;
display: block;
}

/* ######### Black Strip Main Menu Bar CSS ######### */
.mattblackmenu ul{
margin: 0;
padding: 0;
font: bold 12px Verdana;
list-style-type: none;
border-bottom: 1px solid gray;
background: #414141;
overflow: hidden;
width: 100%;
}
.mattblackmenu li{
display: inline;
margin: 0;
}
.mattblackmenu li a{
float: left;
display: block;
text-decoration: none;
margin: 0;
padding: 6px 8px; /*padding inside each tab*/
border-right: 1px solid white; /*right divider between tabs*/
color: white;
background: #414141;
}
.mattblackmenu li a:visited{
color: white;
}
.mattblackmenu li a:hover{
background: black; /*background of tabs for hover state */
}
.mattblackmenu a.selected{
background: black; /*background of tab with "selected" class assigned to its LI */
}
</style>

<div id="ddtopmenubar" class="mattblackmenu">
<ul>
<li><a href="#">LINK1</a></li>
<li><a href="#" rel="ddsubmenu1">LINK2</a></li>
<li><a href="#" rel="ddsubmenu2">LINK3</a></li>
<li><a href="#">Link4</a></li>
<li><a href="#" rel="ddsubmenu3">LINK5</a></li>
</ul>
</div>
<script type="text/javascript">
ddlevelsmenu.setup("ddtopmenubar", "topbar") //ddlevelsmenu.setup("mainmenuid", "topbar|sidebar")
</script>

<ul class='ddsubmenustyle' id='ddsubmenu1'>
<li><a href='#'>LINK2 ITEM 1</a></li>
<li><a href='#'>LINK2 ITEM 2</a>
  <ul>
  <li><a href='#'>LINK2 ITEM 2.1</a></li>
  <li><a href='#'>LINK2 ITEM 2.2</a></li>
  </ul>
</li>
<li><a href='#'>LINK2 ITEM 3</a>
  <ul>
  <li><a href='#'>LINK2 ITEM 3.1</a></li>

    </ul>
</li>

<li><a href='#'>LINK2 ITEM 4</a></li>
</ul>

<ul class='ddsubmenustyle' id='ddsubmenu2'>
<li><a href='#'>LINK3 ITEM 1</a></li>
<li><a href='#'>LINK3 ITEM 2</a></li>
<li><a href='#'>LINK3 ITEM 3</a>
  <ul>
  <li><a href='#'>LINK3 ITEM 3.1</a></li>
<li><a href='#'>LINK3 ITEM 3.2</a></li>
  <li><a href='#'>LINK3 ITEM 3.3</a></li>
  <li><a href='#'>LINK3 ITEM 3.4</a></li>
  </ul>
</li>
<li><a href='#'>LINK3 ITEM 4</a></li>
<li><a href='#'>LINK3 ITEM 5</a>
  <ul>
  <li><a href='#'>LINK3 ITEM 5.1</a></li>
  <li><a href='#'>LINK3 ITEM 5.2</a>
    <ul>
    <li><a href='#'>LINK3 ITEM 5.2 1</a></li>
    <li><a href='#'>LINK3 ITEM 5.2 2</a></li>
    <li><a href='#'>LINK3 ITEM 5.2 3</a></li>
    </ul>
  </li>
    </ul>
</li>
<li><a href='#'>LINK3 ITEM 6</a></li>
</ul>

<ul class='ddsubmenustyle' id='ddsubmenu3'>
<li><a href='#'>LINK5 ITEM 1</a></li>
<li><a href='#'>LINK5 ITEM 2</a></li>
<li><a href='#'>LINK5 ITEM 3</a></li>
<li><a href='#'>LINK5 ITEM 4</a></li>
<li><a href='#'>LINK5 ITEM 5</a></li>
</ul>

Simple Customizations:


  • Replace the # symbols with your page link/URL
  • Replace the bolded black texts with Page Titles
  • To create a drop down menu inside a Main Menu link simple add to it a rel attribute like rel="ddsubmenu1. Change the drop down number accordingly.
  • Normal li and ul rules apply here to create sub menu and sub sub menu links.
  • Main links are mentioned first and drop down menu links are mentioned separately after the JavaScript call function.
  • To change the background color of the menu simply edit background:
  • #414141

Step 5. Save your widget and you are all done!

Visit your blogs to see the menu working just perfectly. Good Day Pal and Happy Blogging!!!