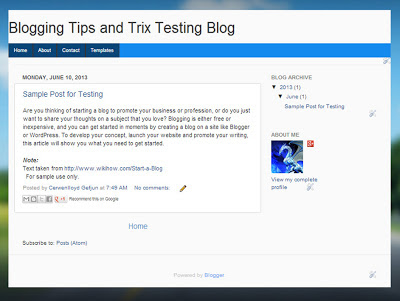
INTO THIS
How to Remove Moz- Border- Radius in Menutabs, Body and Footer Section and Replace it with Straight Vertical Line
Step 2. Click Template
Step 3. Hit the Edit HTML button
Step 4. Look or find the code ]]></b:skin> and just before it paste the code below
.tabs-inner .widget li a {
-moz-border-radius: 0;
-webkit-border-top-left-radius:0;
-webkit-border-top-right-radius: 0;
border-radius: 0 0 0 0;
border-top-left-radius:0px;
border-top-left-radius: 0px;
border-bottom-left-radius: 0;
}
.tabs-inner .widget li:first-child a {
border-top-left-radius:0px;
}
.footer-outer{
border-bottom-left-radius:0;
border-bottom-right-radius:0;
}
.content-outer, .region-inner {
min-height:2px ;
margin: 0 auto ;
background-color:#FAFAFA;
border-top-left-radius:0;
border-top-right-radius:0;
}
Explanation:
- The first set of code ( .tabs-inner .widget li a) is responsible for removing the moz-border-radius of your menu-tabs (inner part).
- The second set of code (.tabs-inner .widget li:first-child a ) is responsible in removing the moz-border-radius (border top left portion) in the first tab of your menu-tabs. In my case this the top left portion of my home tab.
- The third part (.footer-outer ) works in removing those moz-border-radius in your footer area both in left and right portion of it.
- And finally, the last part (.content-outer, .region-inner ) removes those moz-border-radius above your content- outer region.
1. Click here to change the hexadecimal color (FAFAFA)
Step 5. Click preview to see the initial effect of the codes
Step 6. Finally, Save your Template and you are done. Enjoy!
About the Author:


Hello folks! This is GOLDEN WORKS TV, the admin of this blog. No words could described my grateful appreciations to all newbie and professional bloggers around the world and most especially to Almighty God who gave me the wisdom...Read More


 Express yourself!
Howdy! This article could not be written any better!
ReplyDeleteLooking at this article reminds me of my previous roommate!
He constantly kept preaching about this. I'll send this post to him. Fairly certain he'll have a good read.
Thanks for sharing!
My website ... Buy LG 42LS5600 []
oh really!
Delete