Showing posts with label blogging tutorials. Show all posts

Professional Awesome Pinterest icon sets For Free

How to make more simple for individuals to follow us  on Pinterest is thruogh putting a Pinterest Follow button on your online journal, and sway them to stick your post by introducing a Pin It catch. The accompanying custom Pinterest symbols make impeccable take after or Pin It button. The good news for  is that it is free of charge  and comes in distinctive designs, shades and sizes.

Read also : How To Add Pinterest Pin It Button On Image Hover

Have a look at the succeeding images below with its corresponding URL:
1. Retro Pinterest icon by GraphicsVibe. Contains a single png icon in 8 different sizes: 128x128, 96x96, 72x72, 64x64, 48x48, 32x32, 24x24 and 16x16px.
Available at IconArchive.
http://1.bp.blogspot.com/-ZXD7r_Kbo0I/VF4XYv2xPQI/AAAAAAAACsQ/erlrSawebjw/s1600/pinterest-icon.png
2. Pinterest icons by Randa Clay. Contains three 32x32px and three 48x48px png icons.
Available at Randa Clay.

http://4.bp.blogspot.com/-zos6oNZiVt8/VF4ZDBGdXcI/AAAAAAAACsc/GSSSEbeR7qY/s1600/randa%2Bclay%2Bpinterest%2Bicon.jpg

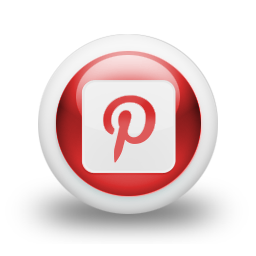
3. Pinterest icon by Dan Leech. Contains a simple red square png icon in 9 different sizes -from 16x16px to 256x256px.
Available at Softicons.


http://1.bp.blogspot.com/-8Ri8kVSN08M/VF4bDO0eiSI/AAAAAAAACso/qJ2FeWRFwAo/s1600/pinterest%2Bicon.png

How To Add Pinterest Pin It Button On Image Hover 4. Pinterest button set by Buttonshut.com. Contains 7 resizable red Pinterest buttons. Available at Buttonshut.
http://3.bp.blogspot.com/-hp_b-PK5hM8/VF4bv8sXsgI/AAAAAAAACsw/HkeNB0O2qOw/s1600/Pinterest-Buttons.png


5. Blue Rectangle Pinterest icon by azmind. Contains a single png icon in 4 different sizes: 128x128, 64x64, 48x48 and 32x32px. Available at IconsPedia.
http://3.bp.blogspot.com/-zH_kQapsVRI/VF4dKMgWFqI/AAAAAAAACs8/_GsJ6Z4TeVQ/s1600/blue%2Bpinterest%2Bicon.png

6. Neon Glow Pinterest icon by GraphicsVibe. Contains a single png icon in 8 different sizes: 128x128, 96x96, 72x72, 64x64, 48x48, 32x32, 24x24 and 16x16px. Available at IconArchive.

http://2.bp.blogspot.com/-ROWy04IpVAE/VF4d84uvfrI/AAAAAAAACtE/YYHknB1XvyA/s1600/pinterest-icon%2Bneon.png
7.  Minimalist Pinterest Icons contains a single png icon in 8 different sizes: 128x128, 96x96, 72x72, 64x64, 48x48, 32x32, 24x24 and 16x16px. Available at Designbolts.
http://2.bp.blogspot.com/-jb8AkpVbx1U/VF4f62b_HnI/AAAAAAAACtQ/HWWJ6OH1HJw/s1600/Pinterest%2Bgear%2Bicon.png
8. Sparkiling Pinterest Icon by Graphics Vibe. This is available at 64x64px, 128x128px, 256x256px. You can download the complete file at Softicons.com
http://1.bp.blogspot.com/-zwkvhLuAxrA/VF4kO7teJuI/AAAAAAAACtc/Hq2ITp5bu3E/s1600/pinterest%2Bsparkling%2Bicon.png

Happy Blogging Buddies!

How to Add Pinterest Pin It button on image hover

Hello buddies! I know you are waiting for my next  article since  in the last few days I was busy in my teaching profession but don't worry because  starting today  I  will try to update my blog more regurly. Today, I will share to you a very nice SEO tip for every blogger to their blog traffic and gain brand exposure and this is all about adding pinterest pin it button to all blog images. Have a mouse hover with image below for a live demo.
add pinterest pin it button

Adding Pinterest Pin It Button on Image Hover


Step 1.  Go to Blogger  Dashboard >> Template >> Edit HTML
Step 2. Locate the code below,
</body>
Step 3. Just above the code in step 2, paste the following code,
<script>
//<![CDATA[
var custom_pinit_button = "http://1.bp.blogspot.com/-HjTDfvaNZFI/VEN1AcG4DfI/AAAAAAAACrM/NPVypMtIqcs/s1600/pinterest-icon.png";
var pinit_button_position = "center";
var pinit_button_before = "";
var pinit_button_after = "";
//]]>
</script>
<script src='http://ajax.googleapis.com/ajax/libs/jquery/1.8.2/jquery.min.js' type='text/javascript'/>
<script id='pinit-img-button' src='http://bloggingtipsandtrix.googlecode.com/svn/trunk/script/pinterest.js' type='text/javascript'>
//  Please visit Bloggingtipsandtrix.blogspot.com for more widgets and tricks.
</script>


Step 4. Save your Template and you are done!

Customiztion:
  • To change the position or location of the pinterest button just replace the red bolded text "center"with topleft, topright, bottomright or bottom left.
  • And to change the Pin it button that appears when mouse hover on it, replace the image link in orange bold text above with your own Pin It button image link or URL.
  • You can also see some available url of Pinterest Icon here.
  •  If you want to disable this in one of your specific images, just go to your specific post and switch it HTML mode and locate the image element and type class="nopin" right before the closing slash and angle bracket as shown in the image below.

That's all buddies! Enjoy!

Turn On and Turn Off The Lights with jQuery Plugin

Hello brothers! Its been a quiet short time here that I was not able to post an article because of some important matters to settle but for now I will share you a widget that could make you happy. This is from Janko and made it bloggerize by helplogger. You can use this widget especially if you are showing a video to your visitor. I will make this tutorial more straight to make it more comprehensive to all of us.
Lights on and lights off Plugin with jQuery

Live Demo: Turn On and Turn Off The Lights with jQuery Plugin

Turn On and Turn Off The Lights with jQuery Plugin


Step 1. Go to Blogger Dashboard >> Template >> Edit HTML
Step 2. Look for the Code below
</head>
Step 3. Just above the code in step 2, paste the code below

<script src='http://ajax.googleapis.com/ajax/libs/jquery/1.10.2/jquery.min.js' type='text/javascript'/>
<script type='text/javascript'>
//<![CDATA[
$(document).ready(function(){
$("#lightsoff").css("height", $(document).height()).hide();
$(".lightSwitcher").click(function(){
$("#lightsoff").toggle();
if ($("#lightsoff").is(":hidden"))
$(this).html("Turn off the lights").removeClass("turnedOff");
else
$(this).html("Turn on the lights").addClass("turnedOff");
});
});
//]]>
</script>
Note: Exclude the red highlighted color if you had already added a jQuery library in your Blogger template.
Step 4.  Look for the code below
]]></b:skin>
Step 5. Just above the code in step 4, paste the following code below

/* Turn off the lights
----------------------------------------------- */
#lightsVideo {
position:relative;
z-index:102;
}
#switch {
max-width:640px;
text-align:left;
position:relative;
height:25px;
display:block;
margin: 25px 0 0 60px;
}
.lightSwitcher {
position:absolute;
z-index:101;
background-image:url(http://3.bp.blogspot.com/-Vs5EJnjVScM/Um0Sq84fJtI/AAAAAAAAEeQ/PEu-OStZciA/s1600/lights-on.png);
background-repeat:no-repeat;
background-position:left;
padding: 0 0 0 20px;
outline:none;
text-decoration:none;
}
.lightSwitcher:hover {text-decoration:underline;}
.turnedOff {
color:#ffff00 !important;
background-image:url(http://3.bp.blogspot.com/-vKGxmBhYshA/Um0Sqwy_hNI/AAAAAAAAEeU/F0WKs6_WARM/s1600/lights-off.png);
}
#lightsoff {
background:#000;
opacity:0.9;
filter:alpha(opacity=90);
position:absolute;
left:0;
top:0;
width:100%;
z-index:100;
}

Step 6. Look for the code below
</body>

Step 7. Just above it, paste the code below
<div id='lightsoff'/>

Step 8. Save your Template
Step 9. Whenever you want to integrate this widget to your post, just copy the code below and paste it in your Blogger Post Editor page in HTML mode.
<center>
<div id="switch"><a class="lightSwitcher" href="javascript:void(0);">Turn off the lights</a></div>
<div id="lightsVideo">
...Here goes the code of the video...
</div>
</center>

How to Make Rotating Image Holder For Blogger Images

Hello guys out there, are you looking for a different and unique  hover effects style to your images? Today, I will share you a rotating image holder for a specific image(s) in your blogger blog. This tutorial was made possible after I visited the about page of  Md. Atiqur Rahman of Bangladesh. This tutorial is divided into  two parts : First, the putting of HTML in your Blogger post editor's page and the second is adding the CSS in your Blogger template source code.
add rotating image holder  for blogger images

Live demo :  How to Make Rotating Image Holder For Blogger Images

Add Rotating Image Holder For Blogger Images


Part A.  Adding HTML code to Blogger Post Editor's page


Step 1. Go to Blogger Dashboard >>  Post or New Post
Step 2. Switch it HTML mode and paste the code below
<div align="center">
<div class="imgholder">
<div class="outer1 circle">
</div>
<div class="outer2 circle">
</div>
<br />
<figure>
   <img src="http://2.bp.blogspot.com/-0qwO4JXS1Dg/U1p3N65cHdI/AAAAAAAACJw/huqQ8h200qU/s1600/blogger+guest+author.jpg" />
   <figcaption class="caption">Manny Pacman</figcaption>
  </figure>
 </div>
</div>
Step 3.  Replace the  orange bold line with the  image url of your own and the red bold line with your own  image caption.

Recommended: How to upload images to Blogger and Get Image Link

Step 4. Save your work and your halfway done!

Part B. Adding of CSS to Blogger Template Source Code


Step 1. Go to Blogger Dashboard >> Template >> Edit HTML
Step 2. Look the code below
]]></b:skin>
Step 3. Copy the code below and paste it above the code in step 2
.imgholder:hover img {
opacity: 1;
filter: alpha(opacity = 100);
transform: scale(1,1);
-ms-transform: scale(1,1);
-moz-transform: scale(1,1);
-webkit-transform: scale(1,1);
}
.imgholder img {
position: absolute;
left: 0;
top: 0;
width: 120px;
height: 120px;
z-index: 2;
/* border-radius: 100px; */
-moz-border-radius: 100px;
-webkit-border-radius: 100px;
opacity: 0.3;
filter: alpha(opacity = 30);
box-shadow: 0 0 5px #000;
-moz-box-shadow: 0 0 5px #000;
/* -webkit-box-shadow: 0 0 5px #000; */
transform: scale(0.5,0.5);
-ms-transform: scale(0.5,0.5);
-moz-transform: scale(0.5,0.5);
-webkit-transform: scale(0.5,0.5);
transition: opacity 1s, transform 1s ease-in-out 0.3s;
-moz-transition: opacity 1s, -moz-transform 1s ease-in-out 0.3s;
-webkit-transition: opacity 1s, -webkit-transform 1s ease-in-out 0.3s;
}
.imgholder:hover .outer1 {
border-color: #0088EA #7FC9FF #0088EA #7FC9FF;
box-shadow: 0 0 10px #0285E2;
-moz-box-shadow: 0 0 10px #0285E2;
-webkit-box-shadow: 0 0 10px #0285E2;
transform: rotate(-10deg);
-ms-transform: rotate(-10deg);
-moz-transform: rotate(-10deg);
-webkit-transform: rotate(-10deg);
}
.imgholder:hover .outer2{ opacity:0.9; filter: alpha(opacity = 90); transform: scale(1,1) rotate(-10deg); -ms-transform: scale(1,1) rotate(-10deg); -moz-transform: scale(1,1) rotate(-10deg); -webkit-transform: scale(1,1)rotate(-10deg);}
.imgholder .outer1 {
top: -8px;
left: -8px;
width: 120px;
height: 120px;
z-index: 2;
border: 8px solid;
border-color: #DEEBFC;
box-shadow: 0 0 3px #AFD3FF;
-moz-ox-shadow: 0 0 3px #AFD3FF;
-webkit-box-shadow: 0 0 3px #AFD3FF;
background: #ffffff;
background: -moz-radial-gradient(center, ellipse cover, #ffffff 0%, #e2efff 100%);
background: -webkit-gradient(radial, center center, 0px, center center, 100%, color-stop(0%,#ffffff), color-stop(100%,#e2efff));
/* background: -webkit-radial-gradient(center, ellipse cover, #ffffff 0%,#e2efff 100%); */
background: -o-radial-gradient(center, ellipse cover, #ffffff 0%,#e2efff 100%);
background: -ms-radial-gradient(center, ellipse cover, #ffffff 0%,#e2efff 100%);
background: radial-gradient(center, ellipse cover, #ffffff 0%,#e2efff 100%);
filter: progid:DXImageTransform.Microsoft.gradient( startColorstr='#ffffff', endColorstr='#e2efff',GradientType=1 );
transform: rotate(90deg);
-ms-transform: rotate(90deg);
-moz-transform: rotate(90deg);
-webkit-transform: rotate(90deg);
transition: transform 1.8s ease-in-out, box-shadow 1s ease-out, border-color 1.5s;
-moz-transition: -moz-transform 1.8s ease-in-out, -moz-box-shadow 1s ease-out, border-color 1.5s;
-webkit-transition: -webkit-transform 1.8s ease-in-out, -webkit-box-shadow 1s ease-out, border-color 1.5s;
}
.imgholder .circle {
position: absolute;
border-radius: 100px;
-moz-border-radius: 100px;
-webkit-border-radius: 100px;
}
.imgholder .outer2 {
top: -18px;
left: -18px;
width: 136px;
height: 136px;
z-index: 1;
border: 10px solid;
border-color: #D6E5FC #9BC8FF #D6E5FC #9BC8FF;
box-shadow: 0 0 20px #8EB9FF;
-moz-box-shadow: 0 0 20px #8EB9FF;
-webkit-box-shadow: 0 0 20px #8EB9FF;
opacity: 0;
filter: alpha(opacity = 0);
transform: scale(1.3,1.3) rotate(180deg);
-ms-transform: scale(1.3,1.3) rotate(180deg);
-moz-transform: scale(1.3,1.3) rotate(180deg);
-webkit-transform: scale(1.3,1.3) rotate(180deg);
transition: opacity 0.5s, transform 0.7s ease-out;
-moz-transition: opacity 0.5s, -moz-transform 0.7s ease-out;
-webkit-transition: opacity 0.5s, -webkit-transform 0.7s ease-out;
}
.imgholder .circle {
position: absolute;
border-radius: 100px;
-moz-border-radius: 100px;
-webkit-border-radius: 100px;
}
.imgholder:hover figcaption {
top: 85%;
}
.imgholder figcaption {
position: absolute;
left: -5px;
top: 31%;
width: 130px;
color: #004E87;
font-weight: bold;
text-shadow: -1px -1px 0 #fff;
z-index: 4;
transition: top 0.5s ease-out;
-moz-transition: top 0.5s ease-out;
-webkit-transition: top 0.5s ease-out;
}

Step 4. Save your work and your done with the tutorial

Customization:


We will focus  first  on the image holder on its default and with  a mouse hover effects on it.
On default for image holder outer 1: Change the hexadecimal color #DEEBFC with another one. You can try also  our hexadecimal colors.

With mouse hover for image holder outer 1: Replace the hexadecimal colors #0088EA #7FC9FF #0088EA #7FC9FF with another sets. The sequence is from top (#0088EA), right (#7FC9FF ), bottom (#0088EA ), and left ( #7FC9FF) respectively.

 With mouse hover for image holder outer 2:  Just change the hexadecimal colors #D6E5FC #9BC8FF #D6E5FC #9BC8FF with another sets. The sequence is from top (#D6E5FC), right (#9BC8FF ), bottom (#D6E5FC), and left ( #9BC8FF ) respectively.

 For the image holder caption in its default setting, change #004E87  to change  the color of the image caption. You can also change the margin by customizing the top and left attributes of the CSS under .imgholder figcaption.

And finally for the hover effect on the  image caption, replace the margin attribute which is 85% for the top margin depending on the position of your caption of the image on your post.

How to Integrate Font Awesome to Blogger Sidebar

Hello friends out there! Font Awesome integration to our  Blogger posts body is really nice. This give more emphasis to the meaning of our written article aside from putting professional images on it. Today, I will share  how to add font awesome icons to your sidebar since it also provoke your readers to stay longer in your blog to by clicking the widget below on it like your most commented widget, popular posts and the like. You can also glance my sidebar to the live demo of this post. Without much words to say buddies, let us proceed to its tutorial.
add font awesome to blogger sidebar

Recommended


How to Add Font Awesome to Blogger Sidebar


Step 1. Go to Blogger Dashboard >> Template >> Edit HTML
Step 2. Locate the code below
</head> 

Step 3. Just above the code in step 2, paste the code below
<link href="http://netdna.bootstrapcdn.com/font-awesome/4.0.3/css/font-awesome.css" rel="stylesheet"/>

Note:  Just skip this step, if you have already installed the font awesome icon library in your blog

Step 4. Go back to Blogger Dashboard >> Lay- out
Step 5. Select among your Sidebar widget of which among them you are going to put the font awesome icon
For example in my case, I choose the widget which is  "Categories". Locate the widget ID  of it by clicking its name "Categories" and click the address bar which is located in the top portion on it. The image  below will speak more of what I mean to say.
add font awesome to blogger sidebar

Step 6. Go to Template and click Edit HTML
Step 7. Inside your template Editor's page type the widget ID of your sidebar gadget (Label 1)
Step 7. Expand the code by clicking the triangle as shown in the image above (the triangle after the violet arrow)
Step 8. Then you will see the code below, click it to expand


Step 9. Then you will see the code below
<b:if cond='data:title'>
    <h2><span><data:title/></span></h2></b:if>

Step 10. Insert the HTML line that bears the font awesome icon after the tag <span>. See the example below

<b:if cond='data:title'><h2><span><i class='fa fa-stack-overflow'/><data:title/></span></h2></b:if>

Do this in the other widget in your sidebar! Try to view the list of available icons font awesome for your varied choices.
Thanks Buddies for usual support and God Bless!!!

How to Integrate Properly Font Awesome Icons in Blogger Blog

Everyone of us in the field of blogging wants to play around with our Blogger template and customize its design. Isn't it? One of the interesting  activity is dealing with icons such as buttons, form controls, navigation signals and the like. Most web developers use pictures for such symbols, which have a disadvantage to disintegrate as it increases or decreases  its size. But don't worry since we have a Font Awesome Icons  which can help us to solve such problem.
add font awesome to blogger successfully

Font Awesome- Meaning


Font Awesome is a notable textual style initially developed by Bootstrap. It is a gathering of some SVG (Scalable Vector Graphic) symbols that might be redone, and utilized on any page. These are minimal measured symbols that are not overwhelming on size, but then are versatile, which implies they hold their honesty when they're extended to essentially any size.

Textual style Awesome contains a gathering of 369 SVG symbols from a wide exhibit of classifications, including route controls, structure controls, catches, coin symbols, web application and brand symbols, etc

Textual style amazing symbols are extremely lightweight, and they stack much quicker as contrasted with CSS sprite pictures. They are likewise versatile, and could be changed into any size without having their quality effected

The best part - they're effectively adaptable! You can apply CSS styles to change them as indicated by your needs. You can change their size, shade, shadows - anything that can ordinarily be finished with CSS.

Adding Font Awesome icons to Blogger?


Follow the very simple steps below  to add Font Awesome icons anywhere on your Blogger blog (or any HTML webpage for that matter).


Step 1. Go to Blogger dashboard >> Template >> Edit HTML and locate the code below
</head>

Step 2. Once you've located the header section, copy the following line below and paste it  just above that code.
<link href="http://netdna.bootstrapcdn.com/font-awesome/4.0.3/css/font-awesome.css" rel="stylesheet"/>

Pick an icon of your preference, and note down its CSS Class name (for e.g. fa-arrow-down). Now, to use this icon, use the <i> tag as shown below.

<i class="fa fa-arrow-down"></i>


You can replace the highlighted texts with the class name of any icon you like. And since this is an inline tag, you can use it inside a paragraph tag, list tag, even anchor (<a>) tag, and so on.
Please see my sidebar on how to add font awesome icons  and my navigation tab below to see how it works.
You can view a list of available icons in Font Awesome.

Editing icons


You can apply any CSS Style to an icon. Just take the class name, and write a new CSS style as shown below.

.fa-arrow-down{
 font-size: 30px;
 color: #ddd;
 padding: 8px;
 border: 1px dashed #000;
 float:left;}
Hope you find this tutorial helpful to you buddy and if you have questions you can leave it at our comment box.
Thank You and have a Nice Day!!!

How to Add Professional Text and Image Slider In Blogger

Marquee is one of the best tools to use if you want to make a text and image slider in your Blogger blog. In this post I will show on how to use this marquee tool in two different ways. First is we will make your texts slide from right to left and pause it as the mouse passes over (hover) it. Second is we will use images that slide  from right to left, pause it when mouse hover at the center part of the frame and it moves fast upon putting the mouse cursor near at the left side of the frame.
 professional text and image slider for blogger

Demo: Make Text and Image Slider Using Marquee

You may also browse some of  the posts that talks on Image Slider:

How to Make  Text Slider Using Marquee In Blogspot


Step 1. Go to Blogger Dashboard >> Template (back-up) >>Edit HTML
Step 2. Look for the code below,

</head>

Step 3. Just above that code in step 2, place the code below

<script src="https://bloggingtipsandtrix.googlecode.com/svn/marquee_slider.js" type="text/javascript">

Step 4. Save your template and your partly done
Step 5. Go back  to Blogger Dashboard >> Post or New Post
Step 6. Switch your Blogger Post editor page to HTML mode and then paste the code below for the text slider style,


<div class="slider_text" id="marqueetext"> Bloggingtipsandtrix is happy to serve you. Bloggingtipsandtrix  is happy to serve you.  Bloggingtipsandtrix  is happy to serve you. Bloggingtipsandtrix  is happy to serve you. Bloggingtipsandtrix  is happy to serve you.
</div>
<script type="text/javascript">
marqueeInit({
 uniqueid: 'marqueetext',
 style: { //style object for this marquee container (use quotes on both sides of the : as shown)
    'width': '100%',
    'height': '1.6em',
    'color': '#fff',
    'background-color': '#158aee',
    'font-family': 'sans-serif',
    'margin': '0 auto'},
      inc:1, //speed - of marquee slider.
 });

</script>

Step 7. And for the image slider, copy the code below and paste it in your Blogger post editor's page (HTML mode)
<div class="marquee_slider" id="marqueeimage">
<a href="##########" target="_blank"> <img src="***** " /> </a>
<a href="##########" target="_blank"> <img src="*****" /> </a>
<a href="##########" target="_blank"> <img src="***** " /> </a>
<a href="##########" target="_blank"> <img src="*****" /> </a>
<a href="##########" target="_blank"> <img src="***** " /> </a>
<a href="##########" target="_blank"> <img src="*****" /> </a>
<a href="##########" target="_blank"> <img src="***** " /> </a>
<a href="##########" target="_blank"> <img src="*****" /> </a>
</div>
<script type="text/javascript">
marqueeInit({
 uniqueid: 'marqueeimage',
 style: { //style object for this marquee container (use quotes on both sides of the : as shown)
    'width': '400px',
    'height': '100px',
    'color': '#fff',
    'border-top': ' 5px dashed white',
    'border-bottom': ' 5px dashed white',
    'border-left': ' 0px dashed white',
    'border-right': ' 0px dashed white',
    'background-color': '#158aee',
    'font-family': 'oswald',
    'margin': '5px auto'},
 inc:1, //speed - of marquee slider
 mouse: 'cursor driven', //mouseover behavior ('pause' 'cursor driven' or false)
 moveatleast: 4,
 neutral: 150,
 savedirection: true
});
</script>

Customization:

Replace the sign ########### with the link (url) you desired
Change the sign *****  with your image link.
Change 400px  and 100px with your preferred  image width  and height
Replace #158aee with another hexadecimal color.
Change border styles with your own and its numerical value, the bigger the number the larger its size
Change 1 to much higher number to speed up the movement of the slides.

Step 8. Save your work and your done pal. Congrats!


How to Make Text Slider in Blogger

After observing  the about page of  OLX.com, I decided to make a slider not for the image but  a slider intended for the texts. You can put this technique in your about page, in your sidebar or anywhere you like. Furthermore,  this innovation also adds professionalism to your works.  Without much words to say, let's make a texts slider for your Blogger blog!
professsional texts slider for blogger


Recommended:


Put a  Text Slider in Blogger Blog


Step 1. Go to Blogger Dashboard >> Edit HTML (back-up your Template)
Step 2. Find the code below,
</head>
Step 3. Just above that code in step 2, paste the code below,
<script src='//ajax.googleapis.com/ajax/libs/jquery/1.9.1/jquery.min.js'/>

<script>
$(document).ready(function(){
$(&#39;.timeline-item&#39;).first().addClass(&#39;active&#39;);
$(&#39;article.2006&#39;).slideToggle();
$(&#39;.timeline-item&#39;).click(function(e) {
e.preventDefault();
var clickid = $(this).attr(&#39;id&#39;);
var active = $(&#39;.timeline-item.active&#39;);
var activeid = active.attr(&#39;id&#39;);

if ( $(this).hasClass(&#39;active&#39;) ) {
return;
}
else {
active.removeClass(&#39;active&#39;);
$(this).addClass(&#39;active&#39;);
$(&quot;article.&quot;+ activeid ).slideToggle();
$(&quot;article.&quot;+ clickid ).slideToggle();
}
});

$(&quot;.carousel span:first&quot;).fadeIn();

jQuery.fn.timer = function() {
if(!$(&#39;.carousel&#39;).children(&quot;span:last-child&quot;).is(&quot;:visible&quot;)){
$(&#39;.carousel&#39;).children(&quot;span:visible&quot;)
.fadeOut()
.next(&quot;span&quot;).fadeIn();
}
else{
$(&#39;.carousel&#39;).children(&quot;span:visible&quot;)
.fadeOut()
.end().children(&quot;span:first&quot;)
.fadeIn;
$(&quot;.carousel span:first&quot;).fadeIn();
}
} // timer function end

window.setInterval(function() {
$(&#39;.carousel&#39;).timer();
}, 1500);

   });
</script>

Step 4. Look for the code ]]></b:skin> . Above it, paste the code below,
.carousel span {
width: 50%;
font-size: 40px;
text-align: center;
position: absolute;
font-family: oswald;
left: 25%;
color:#158aee;
display: none;}

Step 5. Save your Template and you're halfway done!
Every time you want to integrate this style in your post just copy the code below,
<div class="carousel">
<span style="display: none;"><a href="http://btt-testblog1.blogspot.com/">Bloggingtipsandtrix</a></span>
     <span style="display: none;">offers</span>
     <span style="display: none;">Latest Blogger tutorials</span>
     <span style="display: none;">tips</span>
     <span style="display: none;">tricks</span>
     <span style="display: none;">news</span>
     <span style="display: none;">tools and resources</span>
     <span style="display: none;">presented in more understandable</span>
     <span class="last" style="display: none;">and easy way</span>
    </div>


Customization:
Replace the italic bold texts with your own texts
You can also add link to each group of texts. See the first word Bloggingtipsandtrix as an sample.
Change also the time 1500 to speed up or slower the text to appear. The bigger the numerical value the slower it appears and smaller the numerical value the earlier it appears.
Finally, for the css above, you can change the font size 40px. Greater numerical value the bigger its size and vice versa. And the text color #158aee. Select  variuos hexadecimal color for your guide.

Add Multi Menu Tabs Widget in Blogger Sidebar

Hello guys, I wanna share you a trick about adding Multi Menu Tabs Widget in  your Blogger sidebar. This widget looks similar to Wordpress blog and therefore it is more good looking. Some features here are:
  • You can add as many widgets as you want inside a single tab/line.

  • Beautiful and highly customizable CSS.

  • Jquery effects are added this time to the tab views.
add wordprees multitab widget in blogger

Without much word to say, let us now learn how to add this professional looking tab widget into your Blogger sidebar . Don't worry dear because we will make this tutorial easy and simple to install.

How To Add this Multi Tabbed Widget To Blogger?


We will divide tutorial  into   three easy parts which are:

  • Adding  JQuery and JavaScript to your Blogger templates

  • Adding the CSS

  • Adding the HTML

Adding the JQuery and JavaScript to your Blogger Templates


Step 1. Go To Blogger >> Design >> Edit HTML ( Backup your template for reference)
Step 2. Search for
]]></b:skin>
Step 3. Just below or after that code in (Step 2) paste this code
Step 4. Save your template and your halfway done!

Adding the CSS


Step 1.  Inside your template, again  search for  the code below
]]></b:skin>
Step 2. Just above it paste the code below,


/*---- Multi Tab Widget for Sidebar  by BTT ----*/

.BTT-tabs{list-style:none;list-style-type:none;margin:0 0 10px 0;padding:0;height:26px}
.BTT-tabs li{list-style:none;list-style-type:none;margin:0 0 0 4px;padding:0;float:left}
.BTT-tabs li:first-child{margin:0}
.BTT-tabs li a{color:#fff;background:#158aee;padding:5px 5px;display:block;text-decoration:none;font:bold 12px Arial,Helvetica,Sans-serif;border-radius:5px;-webkit-box-shadow: 0 -2px 30px #1751ff;
box-shadow: 0 2px 6px #1751ff;
border-top: 1px solid #1484fc;
border-bottom: 1px solid #1484fc;}
.BTT-tabs li a:hover,.BTT-tabs li a.BTT-tabs-current{background:#8168FD;color:#fff;text-decoration:none}
.BTT-tabs-content{border: 1px dotted #ddd}
.BTT-tabviewsection{margin-top:10px;margin-bottom:10px;}

Adding the HTML


Step 1.  Search/look for  the code below
<div id='sidebar-wrapper'>

or
<div class='column-right-inner'>

Step 2. Just below that code in step 1. paste the code below,

<div class='BTT-tabviewsection'>
<script type='text/javascript'>
            jQuery(document).ready(function($){
                $(&quot;.BTT-tabs-content-widget-BTT-id&quot;).hide();
                $(&quot;ul.BTT-tabs-widget-BTT-id li:first a&quot;).addClass(&quot;BTT-tabs-current&quot;).show();
                $(&quot;.BTT-tabs-content-widget-BTT-id:first&quot;).show();
                $(&quot;ul.BTT-tabs-widget-BTT-id li a&quot;).click(function() {
                    $(&quot;ul.BTT-tabs-widget-BTT-id li a&quot;).removeClass(&quot;BTT-tabs-current a&quot;);
                    $(this).addClass(&quot;BTT-tabs-current&quot;);
                    $(&quot;.BTT-tabs-content-widget-BTT-id&quot;).hide();
                    var activeTab = $(this).attr(&quot;href&quot;);
                    $(activeTab).fadeIn();
                    return false;
                });
            });
        </script>
<ul class='BTT-tabs BTT-tabs-widget-BTT-id'>
<li><a href='#widget-BTT-id1'>About</a></li>
<li><a href='#widget-BTT-id2'>Blog Archive</a></li>
<li><a href='#widget-BTT-id3'>Follow by Email</a></li>
</ul>
<div class='BTT-tabs-content BTT-tabs-content-widget-BTT-id' id='widget-BTT-id1'>
<b:section class='sidebar' id='sidebartab1' preferred='yes'>
</b:section>                                    
</div>
<div style='clear:both;'/>                      
<div class='BTT-tabs-content BTT-tabs-content-widget-BTT-id' id='widget-BTT-id2'>
<b:section class='sidebar' id='sidebartab2' preferred='yes'>
</b:section>                                      
</div>
                     
<div style='clear:both;'/>
<div class='BTT-tabs-content BTT-tabs-content-widget-BTT-id' id='widget-BTT-id3'>
<b:section class='sidebar' id='sidebartab3' preferred='yes'>
</b:section>                                      
</div>
</div>
<div style='clear:both;'/>
You can replace About Me, Blog Archive and Follow by Email with your Widget Titles that you will be adding.

Step 3.  Now Go To Page Elements and you will see something like the screenshot below,
add multitab widget ti blogger sidebar


Let me know how you find it?

Hope this tutorial help you in some other ways. Peace and blessings buddies =D
Credits from: MBT


How To Create Professional Image Slideshows with Jquery In Blogger


Having a stunning image  slideshow is not only for  the one who runs an image blog.  It can be also used to improve your user's experience and in return will increase blog traffic. Furthermore, it will boast your readers to discuss or comment since people will be more interactive if they will not only read texts but also see  images. Search engine robot will appreciate more to your post which lead to a better  position in search engine results page. I've learned this trick from MBT and do some changes on the script,css and the HTML to have a difference. Before we will go the tutorial, please see first the live demo.
image slideshow in blogger

Make Stunning Image Slideshow With Jquery For Your Blogger Blog


Step 1. Go to your Blogger Dashboard >>  Post  or any post you want
Step 2. Copy the  the code below and paste it in your Blogger Post editor page  ( be sureto  switch it to HTML mode).


<script src="http://ajax.googleapis.com/ajax/libs/jquery/1.4.2/jquery.min.js" type="text/javascript"></script>
<script src="http://s3slider-original.googlecode.com/svn/trunk/s3Slider.js" type="text/javascript"></script>
<script type="text/javascript">
    $(document).ready(function() {
   $('#BTT-slider').s3Slider({
      timeOut: 3000
   });
});
</script>
<style>
#BTT-slider {
   width: 590px; /* Keep it 20px-40 px greater than ACTUAL Image size */
   height: 335px;
   position: relative;
   overflow: hidden;
   margin-left: 0;
}
#BTT-sliderContent {
   width: 590px;
   position: absolute;
   top: 0;
   margin-left: 0;
}
.BTT-sliderImage {
   float: left;
   position: relative;
   display: none;  top: 0;
   border:1px solid #ddd;
}
.BTT-sliderImage span {
position: absolute;
    font: 10px/15px sans-serif,Arial, Helvetica;
    padding: 10px 10px;
    background-color: #000;
    color: #fff;
    filter:'alpha(opacity=70)';
    -moz-opacity: .5;
    -khtml-opacity: .5;
    opacity: .5;
    text-align:justify;
}
.BTT-sliderImage span a {
text-decoration:underline;
color:#FE6602;
}
.clear {
   clear: both;
}
.top {
    top: 0;
    left: 0;
    width: 570px !important;
    height: 70px;
}
.bottom {
    bottom: 100px;
    left: 0;
    width: 570px !important;
    height:70px;
}
.left {
    left: 0;
    top: 0;
    width: 100px !important;
    height: 335px;
}
.right {
    right: 30px;
    bottom: 90px;
    width: 100px !important;
    height: 335px;
}
</style>

<br />
<div id="BTT-slider">
<ul id="BTT-sliderContent">
<li class="BTT-sliderImage"> 
<a href="http://www.bloggingtipsandtrix.blogspot.com/"><img src="IMAGE URL HERE" /></a>
<span class="top"><h3>
FIRST HEADING HERE</h3>
DESCRIPTIONS HERE</span>
</li>
<li class="BTT-sliderImage">
<a href="http://www.bloggingtipsandtrix.blogspot.com/"><img src="IMAGE URL HERE" /> </a>
<span class="right"><h3>
SECOND HEADING HERE</h3>
DESCRIPTIONS HERE</span>
</li>
<li class="BTT-sliderImage">
<a href="http://www.bloggingtipsandtrix.blogspot.com/"><img src="IMAGE URL HERE" /></a>
<span class="bottom"><h3>
THIRD HEADING HERE</h3>
DESCRIPTIONS HERE</span>
</li>
<li class="BTT-sliderImage">
<a href="http://www.bloggingtipsandtrix.blogspot.com/"><img src="IMAGE URL HERE" /> </a>
<span class="left"><h3>
FOURTH HEADING HERE</h3>
DESCRIPTIONS HERE</span>
</li>
<div class="clear BTT-sliderImage">
</div>
</ul>
</div>
<br />


Note: Remove the (code in red bolded texts ) jQuery library in the first line of this set of code if you had already added a jQuery library in your template.


Customization


Replace the link "http://www.bloggingtipsandtrix.blogspot.com/"with your own URL.
Change "IMAGE URL HERE"with the URL of your image. See here how to get the image url of the image.
Replace the Italic bold texts "FOURTH HEADING HERE and DESCRIPTIONS HERE" with your heading and descriptions respectively.
If you want to see the appearance of the slider from left and so on , write it at the first span class and the next position as well.
Change the   timeOut: 3000 to your prefered lapse time of the slider to appear. The higher the number the slower it to appear and the lesser the time is the more fast the next image slide  to appear.


How to Add Another Image Slide to the Slider


Simply add the code below above the line <div class="clear BTT-sliderImage">
<li class="BTT-sliderImage">
<a href="http://www.bloggingtipsandtrix.blogspot.com/"><img src="IMAGE URL HERE" /> </a>
<span class="left"><h3>
FOURTH HEADING HERE</h3>
DESCRIPTIONS HERE</span>
</li>
Step 3. Save your work and cheers ;-)

How to Disable Copying Content In Your Blogger Blog

It takes a lot of time to make post and publish it the same. But it is depressing when some people try to copy it very easy and worst if they don't give any credits to you as the maker of it. In this post, I will share to you how to  make your blog content not be copied from  others. Please follow the steps below:

Prevent Copying Content From Your Blog


Step 1. Go to your Blogger Dashboard >> Template
Step 2. Click Edit HTML (always back -up your template)
Step 3. Find the code below in your Blogger template editor's page
]]></b:skin>
Step 4.  Just above the code in step 3, paste the code below
.post {-webkit-user-select: none; -khtml-user-select: none; -moz-user-select: -moz-none; -ms-user-select: none; user-select: none;}
Note: The code (step 4) above is responsible for enabling all the texts of your post not to be copied by your readers.


Step 5. Save your template and relax ;-)

Now, if you're sharing a set of codes to your readers like what I am doing in this blog and want  only to enable my readers to copy the set of codes inside the blockquote. Then use the code below.
-webkit-user-select: text; -khtml-user-select: text; -moz-user-select: text; -ms-user-select: text; user-select: text;}

Note: Paste the above code inside your blockquote code, see example below
.post blockquote {
background: #f2f1f1 url(http://4.bp.blogspot.com/-qQtGAwEvWXg/Uev3BWO9DJI/AAAAAAAABVQ/5Tapnwx2qT8/s620/blockquote+2.png)no-repeat bottom center;
background-position: ;
margin: 0 5px;
padding: 10px 14px 51px 45px;
font-size: 0.5em;
font: normal 0.8em "Verdana",Arial, Georgia,Times, serif;
border-top: 1px solid #158aee;
border-right: 1px solid #158aee;
border-left: 1px solid #158aee;
border-bottom: 1px solid #158aee;
-webkit-user-select: text; -khtml-user-select: text; -moz-user-select: text; -ms-user-select: text; user-select: text;
}
Note: Still you need to paste the code in step 4 in order to disable copying the texts in your post but with the exception of  the code/texts inside your blockquote.

If you have questions or suggestions in this article, please leave it at ou comment box below
Peace Buddies! :-}


How To Add Texts Below Post Comment Updated!

In my prevoius tutorial about "How to Add Texts Below Post a Comment section Version 1", it was stated there that you can add texts or direction for your your readers to have direction  in writing  there comments in order to avoid spam or chessy comments from them. But the problem is, if there's someone who already added a comments at the comment box, those lines of texts or direction will automatically disappear. Here in this tweak, I will show the steps on how to add texts in your template in order to display it even if someone has already added a comments on your post. Please follow the very easy steps below.

Also Read: Changing "Post a Comment" With Image and Text

Add Texts Below "Post A Comment" Updated!


Step 1. Go to your Blogger Dashboard >> Edit HTML (then click Back-up/Restore for your reference).
Step 2. Find the code below by clicking first anywhere  inside your template editor's page then  use the  Control F (in your mouse).
put texts below post a comment

<h4><data:post.commentLabelFull/>:</h4>
Note: Choose the second occurrence of the code.
 Step 3. Just after or below that code in step 2. is the place where you will add the your texts or direction
Here is the sample of texts:

<br/><br/>
    <b><span style="color: red;"><u>Read Comment Policy</u></span></b><br/><br/>
Your feedback is always appreciated. We will try to reply to your queries as soon as time allows.
<br/>
<br/>
    <b><span style="color: red;">Note:</span></b>
    <br/><br/>
    <b>No Cheesy or spam comments.</b>
<br/>
<br/>
 Best Regards,
<br/>
<br/>
  Your Name Here
Step 4. Now, if you want to add texts just beside the number of comments for example (1 comment)
Simply look the symbol ":" with no (quotation). You can found this symbol just above the code in Step 2. Please your texts just after it. Please see the sreenshot below.
add texts below post a comment

put texts beside the comments

Step 4. Save your Template and you're done!
If you have some questions or suggestions regarding this article, please drop it at our comment box below.
Happy Blogging pal ; )

How To Add Multiple Author Profile Image Below Post Title In Blogger

Previously, I have posted a tutorial about how to add an author profile image just below post title for a single author blog.  Today, I am going to show you how to add an author profile picture in a multi-author blog. This post is almost the same with that previous tutorial, the only difference is, we need another HTML code to make the profile pic of your co-members to appear just below your post title.  See the screenshot below and the live demo here.

This is necessary if you are running a blog with team of few members (i.e., multi-author blog), then you may get confused about adding an author box for each author or contributor. Displaying the author profile image  by adding the HTML code is a common practice followed by several bloggers. But it is a pretty irritating job to add  an author profile pic every time when they post the article on your blog. So, if you are looking for a solution for it, then today you are at right place. You can add an author bio widget for each team member to your blog by adding HTML code just once in your template.  Without so much word  to say, Let's check out by following the simple steps  below.

Also Check: How To Add Guest  Author Box In Blogger

Step 1. Go to Blogger Dashboard >> Template >> Edit HTML (back- up your template, this is necessary for your reference)
Step 2. Find the code below but choose the second one.
<span class='post-author vcard'>
Step 3. Below that code in step 2 is a code which may look like this:

<b:if cond='data:top.showAuthor'>
          <data:top.authorLabel/>
            <b:if cond='data:post.authorProfileUrl'>
              <span class='fn' itemprop='author' itemscope='itemscope' itemtype='http://schema.org/Person'>
                <meta expr:content='data:post.authorProfileUrl' itemprop='url'/>
                <a class='g-profile' expr:href='data:post.authorProfileUrl' rel='author' title='author profile'>
                  <span itemprop='name'><data:post.author/></span>
                </a>
              </span>
            <b:else/>
              <span class='fn' itemprop='author' itemscope='itemscope' itemtype='http://schema.org/Person'>
                <span itemprop='name'><data:post.author/></span>
              </span>
            </b:if>
        </b:if>
<span class='post-timestamp'>
        <b:if cond='data:top.showTimestamp'>
          <data:top.timestampLabel/>
        <b:if cond='data:post.url'>
          <meta expr:content='data:post.canonicalUrl' itemprop='url'/>
          <a class='timestamp-link' expr:href='data:post.url' rel='bookmark' title='permanent link'><abbr class='published' expr:title='data:post.timestampISO8601' itemprop='datePublished'><data:post.timestamp/></abbr></a>
        </b:if>
        </b:if>
      </span>
Step 4. Delete all that code in step 3.
Step 5. Next is find the code below but again please choose the second one.
.<div class='post-header-line-1'/>
Step 6. Just below that code, paste the code below.

<span class='post-author vcard'>
<b:if cond='data:post.author == &quot;AuthorName&quot;'>
<span class='author'><a href='Author-Profile-URL'><img src='http://4.bp.blogspot.com/-s7omNra0EFc/Ur2GWB60gYI/AAAAAAAAB9E/To8_ASb-O1A/s1600/cerwen+profile+pic.png' style='margin-bottom: -3px; margin-right: 1px; padding: 2px; height: 24px; width: 24px; border:1px solid #d0d0d0; '/></a></span>
</b:if>
        <b:if cond='data:top.showAuthor'>
          <data:top.authorLabel/>
            <b:if cond='data:post.authorProfileUrl'>
              <span class='fn'>
                <a expr:href='data:post.authorProfileUrl' itemprop='author' rel='author' title='author profile'>
                  <data:post.author/>
                </a>
              </span>
            <b:else/>
              <span class='fn'><data:post.author/></span>
            </b:if>
        </b:if>
      </span>

<span class='post-timestamp'>
        <b:if cond='data:top.showTimestamp'>
          <data:top.timestampLabel/>
        <b:if cond='data:post.url'>
          <meta expr:content='data:post.canonicalUrl' itemprop='url'/>
          <a class='timestamp-link' expr:href='data:post.url' rel='bookmark' title='permanent link'><abbr class='published' expr:title='data:post.timestampISO8601' itemprop='datePublished'><data:post.timestamp/></abbr></a>
        </b:if>
        </b:if>
      </span>

Customization of the above code:


1. Replace the blue bold text with your own image url. Click here on how to get the image url of your image.
2.To change your image size, just edit or replace 24 px

Step 7.
 Now, if you have another author(s) that contribute to your blog, simply add the code below just above <b:if cond='data:top.showAuthor'>

<b:if cond='data:post.author == &quot;junjun candol&quot;'>
<span class='author'><a href='https://www.blogger.com/profile/17436144636923330521'><img src='http://4.bp.blogspot.com/-q7Jq_uoMdl0/U2D63r9h87I/AAAAAAAACKQ/PSwgg5lFNeg/s1600/love.jpg' style='margin-bottom: -5px; margin-right: 3px; padding: 2px; height: 28px; width: 28px; border:1px solid #d0d0d0; '/></a></span>
      </b:if>

Note:

1. Replace jun-jun candol with the correct author profile of your co-member.
2. Change https://www.blogger.com/profile/17436144636923330521  with his author profile.
3. Replace http://4.bp.blogspot.com/-q7Jq_uoMdl0/U2D63r9h87I/AAAAAAAACKQ/PSwgg5lFNeg/s1600/love.jpg with his image link respectively.

Hope you liked this complete tutorial on 'how to add multiple author profile below post title'. Let me know your valuable feedbacks about this guide and also share this article with your friends. For more updates, like us on Facebook and subscribe us. Thank You pal!

How to Add Author's Profile Picture Below Post Title In Blogger

Adding author's profile image below post title or above post body is quiete professional in looks since your reader will see or know first who wrote such particular article in your blog.This tutorial will  not be applicable if your blog is run with multi authors but don't worry because I have a separate  tutorial on that topic.
You can see it above this post for the live demo.
add author image above post body


Also Read:

How to Add Author's Profile Pic Beside Post Title
How To Add Author's Profile Picture Below Post In Blogger

Adding Author's Profile Image Just below Your Post Title


Step 1. Go to Blogger Dashboard >> Template >> Edit HTML (back- up your template for your reference)
Step 2.  Find the code below by using the Control F of your keyboard.

Note: There are two occurrences of the code, please choose the second one.
<span class='post-author vcard'>
Step 3. Next to the code in step 2 is a set of codes which may look like the code below:

<b:if cond='data:top.showAuthor'>
          <data:top.authorLabel/>
            <b:if cond='data:post.authorProfileUrl'>
              <span class='fn' itemprop='author' itemscope='itemscope' itemtype='http://schema.org/Person'>
                <meta expr:content='data:post.authorProfileUrl' itemprop='url'/>
                <a class='g-profile' expr:href='data:post.authorProfileUrl' rel='author' title='author profile'>
                  <span itemprop='name'><data:post.author/></span>
                </a>
              </span>
            <b:else/>
              <span class='fn' itemprop='author' itemscope='itemscope' itemtype='http://schema.org/Person'>
                <span itemprop='name'><data:post.author/></span>
              </span>
            </b:if>
        </b:if>
<span class='post-timestamp'>
        <b:if cond='data:top.showTimestamp'>
          <data:top.timestampLabel/>
        <b:if cond='data:post.url'>
          <meta expr:content='data:post.canonicalUrl' itemprop='url'/>
          <a class='timestamp-link' expr:href='data:post.url' rel='bookmark' title='permanent link'><abbr class='published' expr:title='data:post.timestampISO8601' itemprop='datePublished'><data:post.timestamp/></abbr></a>
        </b:if>
        </b:if>
      </span>

We should remove the code above because that is responsible for line " Posted By" with the corresponding date of the post. You can see this line just below your post or article written. See the screenshot below.
show author profile image below post title


Step 4.  After deleting the code above the next  thing is you are going to find the code below. Again choose the second occurrence of the code.
<div class='post-header-line-1'/>
Step 5. Just below it, paste the following code:
<span class='post-author vcard'>
<b:if cond='data:blog.pageType == "static_page"'>
<b:if cond='data:post.author == &quot;AuthorName&quot;'>
<span class='author'><a href='Author-Profile-URL'><img src='http://4.bp.blogspot.com/-s7omNra0EFc/Ur2GWB60gYI/AAAAAAAAB9E/To8_ASb-O1A/s1600/cerwen+profile+pic.png' style='margin-bottom: -3px; margin-right: 1px; padding: 2px; height: 24px; width: 24px; border:1px solid #d0d0d0; '/></a></span>
</b:if></b:if>
        <b:if cond='data:top.showAuthor'>
          <data:top.authorLabel/>
            <b:if cond='data:post.authorProfileUrl'>
              <span class='fn'>
                <a expr:href='data:post.authorProfileUrl' itemprop='author' rel='author' title='author profile'>
                  <data:post.author/>
                </a>
              </span>
            <b:else/>
              <span class='fn'><data:post.author/></span>
            </b:if>
        </b:if>
      </span>

<span class='post-timestamp'>
        <b:if cond='data:top.showTimestamp'>
          <data:top.timestampLabel/>
        <b:if cond='data:post.url'>
          <meta expr:content='data:post.canonicalUrl' itemprop='url'/>
          <a class='timestamp-link' expr:href='data:post.url' rel='bookmark' title='permanent link'><abbr class='published' expr:title='data:post.timestampISO8601' itemprop='datePublished'><data:post.timestamp/></abbr></a>
        </b:if>
        </b:if>
      </span>

Also Read:

How To Get Image link (URL) of the Uplaoded Image in Blogger

Customization:


1. Replace the Author Name with your own author name. This must your  Blogger Profile name. In my case 2. my author name  is Cerwenlloyd Gefjun.
3. Replace the image link (URL) with your image URL. Click here on how to get image url
4. And finally customize the css of your profile image:

         margin- I set it with bottom -3px, and right 1px
         padding- which set by 2px
        height- this your image size (24px)
        width- this is the image width  (24px)
        border size - increase in number will make your border bigger also
        border color- you choose another hexadecimal color here

Questions about the post above are always welcome. Please leave it at our comment box below.
Thanks pal for your time!