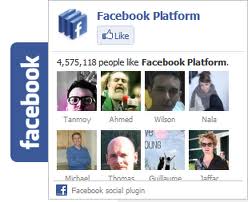
As you could remember before at the right portion of this blog that there is a cool Floating Facebook Like Box that slides very smoothly upon pointing it with the mouse. This widget is very important to your blog for it encourages other people to like your posts and at the same time spread your it freely to the all parts of the globe dramatically. In this post I'm gonna show the steps on how to make it. Don't worry because I will make it very simple one.
Adding Static Facebook Pop Out Like Box at the Right Side Of A Blog With A Hover Effect
Please follow the steps below:
1. Go to your Blogger Dashboard, click Template >> Edit HTML
2. Please check the "Expand Widget Templates" box at the topmost portion.
3. Search (CTRL + F) for this tag
</head >
4. Add the code below just above the </head> tag.
<script src="https://ajax.googleapis.com/ajax/libs/jquery/1.7.1/jquery.min.js"></script>
5. After that ,please save your template.
6. Now go to Layout >> Page Elements >> Click add a new Gadget >> Choose HTML/JavaScript and in the HTML box, paste the code below:
<style type="text/css">
/*<![CDATA[*/
#fbplikebox{display: block;padding: 0;z-index: 99999;position: fixed;}
.fbplbadge {background-color:#3B5998;display: block;height: 150px;top: 50%;margin-top: -75px;position: absolute;left: -47px;width: 47px;background-image: url("https://blogger.googleusercontent.com/img/b/R29vZ2xl/AVvXsEgAvZtc5XeI1vl4dIGLA88ceRRo8Za7E92nHaCait1pzK1G76-O5A0isS63C2195m0liR9Jo9Bl8qw9GviDETyN1aCpRqclTVsLd57Xl8hHf29lEgPRlEAgRrRw1t3gvDS78nBAcRGpARY/s1600/vertical-right.png");background-repeat: no-repeat;overflow: hidden;-webkit-border-top-left-radius: 8px;-webkit-border-bottom-left-radius: 8px;-moz-border-radius-topleft: 8px;-moz-border-radius-bottomleft: 8px;border-top-left-radius: 8px;border-bottom-left-radius: 8px;}
/*]]>*/
</style>
<script type="text/javascript">
/*<![CDATA[*/
(function(w2b){
w2b(document).ready(function(){
var $dur = "medium"; // Duration of Animation
w2b("#fbplikebox").css({right: -250, "top" : 100 })
w2b("#fbplikebox").hover(function () {
w2b(this).stop().animate({
right: 0
}, $dur);
}, function () {
w2b(this).stop().animate({
right: -250
}, $dur);
});
w2b("#fbplikebox").show();
});
})(jQuery);
/*]]>*/
</script>
<div id="fbplikebox" style="display:none;">
<div class="fbplbadge"></div>
<iframe src="http://www.facebook.com/plugins/likebox.php?href=Your Facebook Fan-page URl &width=250&height=250&colorscheme=light&show_faces=true&border_color=%23C4C4C4&stream=false&header=false" scrolling="no" frameborder="0" style="border:none; overflow:hidden; width:250px; height:250px;background:#FFFFFF;" allowtransparency="true"></iframe>
</div>
7. You're almost done, now gonna replace
Your Facebook Fan-page URL in the codes above with the URL of your facebook fan page.
Also replace the
: symbol in your URL with
%3A and
/ with
%2F
For example, my facebook fan page is:
http://www.facebook.com/pages/Bloggingtipsandtrix/533310753378603?ref=hl
After replacing the characters above, your facebook fan page should look like this:
http
%3A %2F %2Fwww.facebook.com %2Fpages %2FBloggingtipsandtrix %2F53331078603?ref=hl
Note: Please neglect the color red and pink for I used it only for guiding purposes.
Now, if it doesn't work, try not to replace the symbols found in your facebook fan page url as stated above.
Other customizations (optional):
- to change the width and height of your facebook box, change the bolded-italic values (250)
- to change the background color of the facebook fan box (logo), replace #FFFFFF with the hex code of your color (click here to choose one)
- if you want to change the color of the facebook badge (facebook button) replace this code #3B5998
with your own.
8. Save your widget.
Click here, for tutorial in putting facebook like/fan box in blogger sidebar.
Credits goes to Helplogger with some modification from me.


