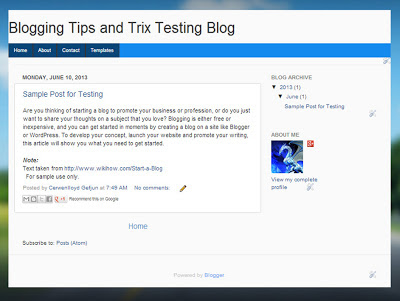
Do you want to make your visitors more busy after reading your posts? Aside from adding widgets such as read more , recent post and popular post, you can still add spice to your blog by adding a multi column footer on it.This kind of footer could be three, four or as many as you want, you just simply adjust the width to let this footer fit to your blog's lay-out.
Live Demo
Step 1. Log -in to your Blogger Account
Step 2. Go to Blogger Dashboard and select the Template button (please back-up your template)
Step 3. Hit the Edit HTML button
Step 4. Search the code below
and just above it paste the code below,
Step 6. Now Save your Template!
Putting Multi Column Footer In Blogger
Step 1. Log -in to your Blogger Account
Step 2. Go to Blogger Dashboard and select the Template button (please back-up your template)
Step 3. Hit the Edit HTML button
Step 4. Search the code below
]]></b:skin>Step 5. And just above ]]></b:skin , paste the following css code:
/*----- BBT COOL MULTI COLUMN FOOTER WIDGET -----*/Step 6. Now we will add a set of code to the body section of your template. Search the code </body>
#lower {
margin:auto;
padding: 0px 0px 10px 0px;
width: 100%;
background:#158aee;
}
#lower-wrapper {
background:#ddd;
margin:auto;
padding: 20px 0px 20px 0px;
width: 960px;
border:0;
}
#lowerbar-wrapper {
background:#FE2EF7;
float: left;
margin: 0px 5px auto;
padding-bottom: 20px;
width: 23%;
text-align: justify;
color:#ddd;
font: bold 12px Arial, Tahoma, Verdana;
line-height: 1.6em;
word-wrap: break-word;
overflow: hidden;
-webkit-transition: all 0.2s ease;
-moz-transition: all 0.2s;
-ms-transition: all 0.2s;
-o-transition: all 0.2s;
border-radius: 30px;
}
#lowerbar-wrapper:hover{
border-radius:0;
background-color: #FE2EF7;
}
.lowerbar {margin: 0; padding: 0;}
.lowerbar .widget {margin: 0; padding: 10px 20px 0px 20px;}
.lowerbar h2 {
margin: 0px 0px 10px 0px;
padding: 3px 0px 3px 0px;
text-align: left;
border:0;
color:#ddd;
text-transform:uppercase;
font: bold 14px Arial, Tahoma, Verdana;
}
.lowerbar ul {
color:#fff;
margin: 0 auto;
padding: 0;
list-style-type: none;
}
.lowerbar li {
display:block;
color:#fff;
line-height: 1.6em;
margin-left: 0 !important;
padding: 6px;
border-bottom: 1px solid #222;
border-top: 1px solid #444;
list-style-type: none;
}
.lowerbar li a {
text-decoration:none; color: #d8d8d8;
}
.lowerbar li a:hover {
text-decoration:underline;
}
.lowerbar li:hover {
display:block;
background: #222;
}
and just above it paste the code below,
<div id='lower'>
<div id='lower-wrapper'>
<div id='lowerbar-wrapper'>
<b:section class='lowerbar' id='lowerbar1' preferred='yes'>
</b:section>
</div>
<div id='lowerbar-wrapper'>
<b:section class='lowerbar' id='lowerbar2' preferred='yes'>
</b:section>
</div>
<div id='lowerbar-wrapper'>
<b:section class='lowerbar' id='lowerbar3' preferred='yes'>
</b:section>
</div>
<div id='lowerbar-wrapper'>
<b:section class='lowerbar' id='lowerbar4' preferred='yes'>
</b:section>
</div>
<div style='clear: both;'/>
</div> </div>
Step 6. Now Save your Template!
Customization:
- Replace 158aee in order to change the color blue (outside your footer section). You can select your hexadecimal color here.
- Replace ddd to change the color of your footer body section.
- Replace FE2EF7 in order to change the pink background of your specific footer widget.
- Replace d8d8d8 to change color title of your list item (li), like for example in the popular post widget the (first) list item is Sample Post for Testing.
- Delete the orange highlighted text above if you want to disable the hover effect on your footer widget.
- To subtract or get one column footer, just delete the tag
- Or if you want to add another column footer, just add the code below,
<div id='lowerbar-wrapper'> <b:section class='lowerbar' id='lowerbar4' preferred='yes'> </b:section> </div>
<div id='lowerbar-wrapper'> <b:section class='lowerbar' id='lowerbar5' preferred='yes'> </b:section> </div>But be sure to replace the width 23% with 17% in order to fit properly all your footer widgets in your footer's body section.
If you have some questions regarding this post, try to contact me or leave a comment below.We are happy to hear your voice pal.
Enjoy and God Bless Us All!!!


